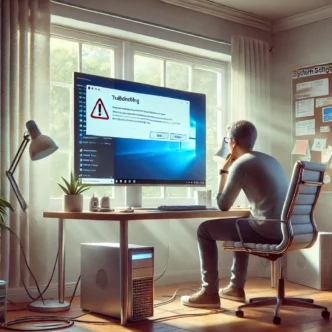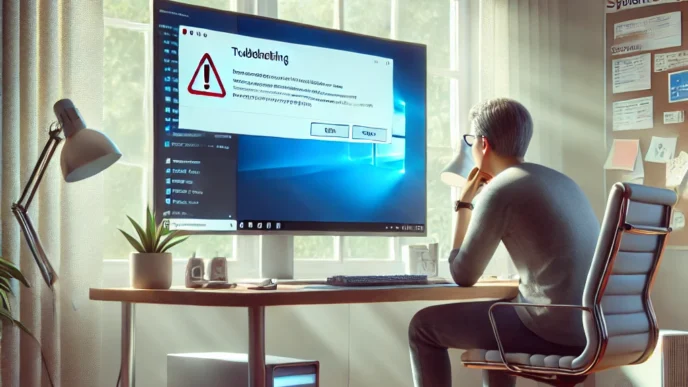

Introduction: Don’t Panic—Fixing PC Error Messages Is Easier Than You Think
When strange popups or cryptic error codes flash on your screen, it can feel like your entire system is falling apart. But here’s the truth: most common PC error messages—whether it’s a Blue Screen of Death, a “DLL not found,” or a stubborn Windows Update failure—can be resolved without calling tech support.
In this beginner-friendly troubleshooting guide, we’ll walk you through the most common Windows PC error messages, explain what they mean, and show you how to fix them using proven, step-by-step methods. Each solution is backed by real-world case scenarios, system diagnostics, and proven troubleshooting insights used by everyday Windows users.
Understanding PC Error Messages: Why They Happen and What They Mean
If you’ve ever seen a cryptic code like “0x80070005” or a popup that says “System Error,” you’re not alone. Error messages on your PC may seem overwhelming, but they’re essentially your system’s way of raising a red flag when something isn’t working right. Understanding the basics of what these messages mean—and why they appear—is the first step toward solving the problem confidently.
🧠 What Are PC Error Messages?
Error messages are alerts generated by your operating system or software when it encounters something it can’t process correctly. They serve as diagnostics—pointing you toward the source of a problem. While they may vary in language or detail, most error messages can be traced back to one of several core categories:
- System Errors – Affect core Windows functions (e.g., boot failure, missing system files).
- Application Errors – Happen within specific programs (e.g., program crashes or “not responding”).
- Driver Errors – Occur when hardware components like printers or graphics cards fail to communicate properly.
- Update Errors – Appear when Windows or other software can’t complete updates successfully.
🔍 Why Do These Errors Happen?
There’s usually a root cause behind each error message. Here are the most common triggers:
- ❌ Corrupt or missing files – Often due to sudden shutdowns, malware, or failed installations.
- ⚠️ Outdated drivers or software – Creates incompatibility with your current system.
- 🔌 Hardware issues – Faulty components like a dying hard drive or failing RAM.
- 🔄 System conflicts – Two or more apps or services interfering with one another.
- 📶 Network or update failures – Interrupted connections during downloads or patch installations.
🧰 How Are These Errors Displayed?
Windows uses a few different methods to communicate issues:
- Pop-up Dialog Boxes – Appear when a program or process encounters a problem.
- Error Codes – Often shown in hexadecimal format (like 0x80240034), used for deeper diagnostics.
- System Tray Notifications – Alerts that inform you of less severe but important errors.
- Blue Screen of Death (BSoD) – A full-screen crash with technical information.
- Event Logs – Accessible via Event Viewer for detailed behind-the-scenes data.
Real-World Example: A user attempting to install a large application repeatedly saw the message “The system cannot find the file specified.” After checking the Event Viewer, the issue was traced to a temporary file path that had been cleared. Reconfiguring the installer’s settings solved the issue—no reinstall required.
🪪 Key Tools That Help Decode Error Messages
While error messages may seem vague at first glance, a few built-in tools can help you understand what’s really going on:
- Event Viewer: Shows a timeline of system and application errors. Navigate to
Event Viewer > Windows Logs > Systemto review details. - Reliability Monitor: A visual tool that highlights recent crashes or failures, accessible via the Control Panel.
- Error Code Lookup Utilities: Use to decode numeric error codes into plain language explanations.
- Task Manager: Great for identifying app-specific problems tied to high CPU, memory, or disk usage.
📌 Why It Matters
Understanding the meaning behind an error message can save you hours of trial and error. It’s the difference between guessing at solutions and solving the problem at its source. Instead of ignoring the next error popup, you’ll know how to categorize it, investigate it, and resolve it efficiently.
In the next sections, we’ll tackle specific types of errors—starting with the most infamous: the Blue Screen of Death—and show you exactly how to troubleshoot them using beginner-friendly steps.
Fixing the Dreaded Blue Screen of Death (BSoD)
Few things are more startling than your screen turning blue with a wall of white text. The Blue Screen of Death (BSoD) is Windows’ way of saying something has gone seriously wrong—but it’s also one of the most solvable issues if approached methodically.
What Causes a BSoD?
BSoDs typically occur when Windows encounters a critical system error it can’t safely recover from. Common triggers include:
- 🔧 Driver conflicts or installation failures
- 💻 Faulty hardware such as failing RAM or a bad hard drive
- 📂 Corrupt system files or registry errors
- 🌡️ Overheating from poor ventilation or aging components
- ⚙️ BIOS or firmware issues (especially after hardware changes)
Real-World Scenario: A user upgraded their graphics hardware, but didn’t update the system drivers. The result? Random BSoDs during video playback. Rolling back to a stable driver resolved the issue.
Step-by-Step: How to Troubleshoot a BSoD
If your PC restarts before you can read the error, disable automatic restarts via the System Properties menu (Advanced > Startup and Recovery). Once you’ve captured the error code or message, follow these steps:
Step 1: Note the Error Message or STOP Code
- On the BSoD screen, look for something like:
STOP CODE: DRIVER_IRQL_NOT_LESS_OR_EQUAL - Write this down. It’s your key to identifying the root issue.
Step 2: Use Event Viewer for Clues
- After reboot, open Event Viewer and navigate to:
Windows Logs > System - Look for entries with red icons or the word “critical” around the time of the crash.
Step 3: Check for Failing RAM or Hardware
- Run your system’s built-in memory diagnostic tool.
- If prompted, restart and let the tool scan your memory for issues.
- Any hardware error detected should be investigated or replaced.
Step 4: Address Driver Issues
- Open Device Manager and look for yellow warning icons.
- For recently updated drivers, consider rolling them back under the Driver tab.
- If a device is misbehaving, uninstall and let Windows reinstall it on reboot.
Step 5: Check for Overheating or Dust Buildup
- Shut down your PC and inspect internal fans or vents.
- Carefully clean any dust that might be blocking airflow.
- Use hard surfaces (not beds or couches) when using laptops to keep ventilation open.
🧠 Remember This
The BSoD isn’t the end—it’s just a warning. While it feels alarming, it’s often triggered by something that can be corrected with a little patience and logical troubleshooting. Most importantly:
- Write down STOP codes
- Don’t ignore signs like recent driver updates or overheating
- Address hardware and software changes methodically
In the next section, we’ll look at another common PC frustration: missing DLL file errors—and how you can resolve them without downloading anything sketchy.
How to Resolve Missing DLL File Errors
Missing DLL file errors can be confusing, especially when a program refuses to launch or crashes without warning. A DLL (Dynamic Link Library) is a file shared by multiple programs, and when it goes missing or gets corrupted, problems arise.
Common Reasons You See a DLL Error
- 📦 A program didn’t install correctly or skipped a required component
- 🧹 You accidentally deleted a shared DLL during manual cleanup
- 🔄 A Windows update conflicted with an older or incompatible DLL
- ⚠️ Malware tampered with system files or replaced them with malicious ones
Scenario: A user uninstalls a rarely used application and later finds that another program won’t launch. Turns out both shared a DLL file, and removing one affected the other.
Safe, Step-by-Step Fixes for DLL Errors
Step 1: Restart Your PC
Before diving deeper, restart. Temporary file loading issues or memory conflicts can sometimes resolve with a fresh boot.
Step 2: Reinstall the Program Showing the Error
- Uninstall the affected program from Settings > Apps
- Reboot the system
- Reinstall it cleanly to restore all missing dependencies
Step 3: Use System File Checker (SFC)
- Open Command Prompt as Administrator
- Type:
sfc /scannowand press Enter - Let Windows scan and repair any corrupted or missing system files
Step 4: Avoid Downloading DLLs from Unknown Sources
Tempted to search for the missing file and download it? That’s risky. DLL download sites often host outdated or malicious versions.
Step 5: Manually Register the DLL (Advanced)
If a DLL is present but not working:
- Open Command Prompt as Administrator
- Run:
regsvr32 filename.dll - You should see a success message if the registration works
💡 Take This With You
DLL errors may look intimidating, but they’re usually a sign that something didn’t install correctly or a system file needs repair. The key is to avoid quick-fix downloads and instead rely on safe, built-in Windows repair tools. In most cases, a reinstall or a system scan gets things working again—no need to panic or pay for help.
Next, let’s tackle one of the most stubborn categories of PC issues: Windows Update errors, and how to resolve them efficiently.
Solving Windows Update Errors Step-by-Step
Windows Update errors can be frustrating—especially when you just want your system to stay secure and up to date. Fortunately, most update errors follow predictable patterns and can be fixed with a series of simple, safe steps.
Common Update Errors You Might See
- 0x800f081f – Update files are missing or corrupted
- 0x8024402f – Network connectivity issues
- 0x80070005 – Permissions or access issues
- 0x8024a105 – General update failure due to miscommunication with Windows servers
🧠 Real-world insight: According to diagnostic data, the majority of update errors—up to 60%—are tied to corrupt components or unresolved system inconsistencies.
Step-by-Step Guide to Fix Update Errors
Step 1: Run the Built-in Troubleshooter
- Go to Settings > Update & Security > Troubleshoot > Additional troubleshooters
- Select Windows Update and run the troubleshooter
- Follow the prompts and let it attempt an automatic fix
Step 2: Clear the Update Cache
Sometimes, downloads get stuck in the cache folder. Clearing it forces Windows to redownload clean versions.
- Open File Explorer and navigate to:
C:\Windows\SoftwareDistribution - Delete all files and folders inside (you may need admin rights)
Step 3: Use the Deployment Imaging Tool (DISM)
This command repairs the Windows system image and resolves component store corruption.
- Open Command Prompt as Administrator
- Run this command:
DISM /Online /Cleanup-Image /RestoreHealth - Let it complete fully—this may take 10–30 minutes
Step 4: Restart and Try the Update Again
After clearing out corrupt files and repairing the system image, reboot and manually reattempt the update process.
🔁 Putting It All Together: Most Windows Update issues can be resolved by clearing cached files and repairing the core system image. These steps are safe, repeatable, and effective—even if you’re not a tech pro.
Now that updates are running smoothly, let’s move on to other frustrating messages—like app crashes and system file corruption.
Dealing With Application Crashes and “Not Responding” Messages
Application crashes or frozen windows can disrupt productivity and spark frustration—especially when you’re in the middle of something important. Whether it’s a program closing unexpectedly or freezing with a “Not Responding” message, these issues are usually tied to a few common causes.
Why Applications Crash or Freeze
There are several underlying reasons behind application instability:
- 🧠 Memory pressure: When your PC runs low on RAM, apps may freeze or crash during use
- 🔄 Software bugs: Some programs have known stability issues in certain versions
- 🔌 Conflicting programs: Two apps trying to access the same resource can clash
- 📦 Corrupted files: Damaged app files or user settings can trigger crashes
Example: A student running a video conferencing app and a heavy spreadsheet program at the same time noticed frequent freezing. Task Manager revealed memory usage was maxed out. Closing unused tabs and upgrading RAM helped resolve the issue.
Step-by-Step Fixes for App Crashes and “Not Responding” Errors
Step 1: Close and Restart the App
- If the window is frozen, press
Ctrl + Shift + Escto open Task Manager - Find the app in the list, right-click it, and select End Task
- Reopen the application and monitor for stability
Step 2: Check for System Resource Overload
- Open Task Manager and click the Performance tab
- Review CPU, Memory, and Disk usage
- If any are nearing 100%, try closing unnecessary programs to free up resources
Step 3: Run the App in Compatibility Mode
- Right-click the app’s shortcut > Properties > Compatibility tab
- Enable Run this program in compatibility mode for: and select an older version of Windows if the app is outdated
Step 4: Update or Reinstall the App
- Go to Settings > Apps > Installed apps
- Uninstall the crashing app, then reinstall a fresh copy
- This replaces corrupted files and resets user settings
Step 5: Check for System File Issues
- Open Command Prompt as Administrator
- Run:
sfc /scannow - This checks and repairs Windows system files that may be affecting app behavior
Common Mistakes to Avoid
- ❌ Ignoring updates: App developers regularly release patches for crashes and bugs
- ❌ Force quitting too quickly: Sometimes, an app is slow—not frozen. Give it a few moments before force-closing
- ❌ Running too many apps: Multitasking with several high-memory apps can lead to crashes, especially on low-RAM systems
📌 Why It Matters
App crashes aren’t always a sign of a broken program—they’re often due to temporary glitches, memory limitations, or minor conflicts. Understanding how to diagnose and reduce the load on your system means fewer interruptions and a smoother computing experience.
Device Manager Error Codes Demystified
When something stops working—like a USB device, printer, or graphics adapter—the first place many users turn is Device Manager. It’s a powerful diagnostic tool, but the error codes it displays can feel cryptic or intimidating.
This section helps break down common Device Manager error codes and explains what they actually mean—along with practical steps to resolve them.
What Are Device Manager Error Codes?
Device Manager error codes are numeric indicators (often with a message like “This device cannot start. (Code 10)”) that Windows uses to describe issues with hardware devices. These problems can involve:
- 🔌 Driver issues: Missing, outdated, or corrupt drivers
- ⚠️ Hardware malfunctions: Faulty or failing components
- 🔄 Resource conflicts: Two devices trying to use the same system resources
- ❓ Incorrect configurations: Disabled devices or improperly set parameters
These codes appear under a device’s status when you double-click it in Device Manager.
Common Error Codes and What They Mean
Here’s a simplified table explaining a few of the most frequently encountered error codes in Device Manager:
| ⚠️ Error Code | 📝 What It Means | 🛠️ Possible Cause |
|---|---|---|
| Code 10 | Device cannot start | Bad driver or firmware conflict |
| Code 19 | Registry configuration is invalid | Corrupt registry entries for the device |
| Code 22 | Device is disabled | Device manually turned off in Device Manager |
| Code 28 | Driver not installed | Missing driver or installation failure |
| Code 43 | Windows stopped the device (problem reported) | Hardware failure or unstable driver |
Real-World Example: A user plugged in a new webcam but it didn’t work. In Device Manager, it showed Code 28. This pointed to a missing driver. After properly installing a compatible one, the device functioned correctly.
Step-by-Step Fixes for Device Manager Errors
Step 1: Restart the Computer
- Before diving deeper, reboot your system. Temporary glitches can trigger device errors that resolve after a restart.
Step 2: Use Device Manager to Re-enable or Reinstall
- Open Device Manager (
Right-click Start > Device Manager) - Right-click the device with an error and choose:
- Enable device, if disabled (Code 22)
- Uninstall device, then restart the PC—Windows will attempt to reinstall it
Step 3: Update Drivers
- Right-click the problem device > Update driver
- Let Windows search for compatible versions. If none are found, proceed to Step 4
Step 4: Check for Hardware Changes
- In Device Manager, click the Action menu > Scan for hardware changes
- This forces Windows to re-detect and reinitialize connected devices
Step 5: Reset System Configurations (for registry errors)
- Some errors like Code 19 are tied to registry corruption
- Resetting the device’s settings (via uninstall) and restarting often helps
- Avoid editing the registry manually unless experienced—it’s easy to make mistakes
Pro Tips to Prevent Device Errors
- ✅ Install Windows updates regularly to benefit from updated device support
- ✅ Avoid unplugging devices while in use, especially USB storage, to prevent corruption
- ✅ Use Safely Remove Hardware when disconnecting external drives or peripherals
💡 Take This With You
Device Manager errors often look more intimidating than they really are. Each code offers a direct clue to the root problem—whether it’s a driver, a configuration setting, or the device itself. By interpreting these codes step by step, you can get most devices working again without needing advanced tech skills.
Scan and Fix System File Corruption (SFC & DISM)
When strange errors start popping up, or your system behaves unpredictably—like features failing to load, programs not launching, or the interface freezing—the underlying cause may be corrupted system files. Fortunately, Windows includes two built-in tools that can help fix this: System File Checker (SFC) and Deployment Image Servicing and Management (DISM).
Let’s walk through how to use them effectively.
What Causes System File Corruption?
Corruption in system files can happen silently and for a variety of reasons:
- ⚡ Sudden shutdowns or power loss
- 💾 Failed Windows updates or installations
- 🦠 Malware that alters critical files
- 🧩 Software conflicts or disk errors
Real-World Scenario: A user noticed certain apps wouldn’t open, and settings pages displayed blank screens. Running the system file scan revealed corrupt system components, which were successfully repaired—restoring normal behavior without needing a full reinstall.
How to Use System File Checker (SFC)
SFC is your first line of defense when system files are suspected to be damaged or missing.
Step-by-Step:
- Open Command Prompt as Administrator
- Press
Windows Key + S, type “cmd”, right-click Command Prompt, and choose Run as administrator
- Press
- Run the SFC Command
- Type:
sfc /scannowand press Enter
- Type:
- Wait for the Scan to Finish
- This process may take 10–15 minutes. It will automatically fix any detected system file issues.
- Review the Results
- You’ll see one of several outcomes:
- No integrity violations found
- Corrupt files found and successfully repaired
- Corrupt files found but couldn’t be fixed (move on to DISM if this happens)
- You’ll see one of several outcomes:
Using DISM When SFC Can’t Fix It
DISM helps repair the underlying system image that SFC relies on, especially if it’s been damaged.
Step-by-Step:
- Open Command Prompt as Administrator (same as before)
- Run the Health Check Command
- Type:
DISM /Online /Cleanup-Image /CheckHealth - This checks for any component store corruption
- Type:
- If Needed, Scan and Restore
- Run:
DISM /Online /Cleanup-Image /ScanHealth - Then:
DISM /Online /Cleanup-Image /RestoreHealth - These deeper scans may take 10–30 minutes and will attempt to fix component corruption
- Run:
- Re-run SFC After DISM
- Once DISM completes, run
sfc /scannowagain to verify all issues are resolved
- Once DISM completes, run
When to Use These Tools
| 🧪 Symptom | 🛠️ Tool to Run First | 📌 Why It Helps |
|---|---|---|
| Apps won’t open or crash randomly | sfc /scannow | Detects and repairs Windows core file issues |
| Windows features missing or broken | DISM /RestoreHealth | Fixes deeper image-level corruption |
| SFC fails to repair files | DISM then SFC (in sequence) | Restores the system so SFC can complete |
Pro Tips for a Smooth Scan
- 🕒 Be patient: Both tools take time—especially on older machines
- 🔌 Stay plugged in: Avoid interruptions during scans to prevent further corruption
- 💾 Back up important files: While rare, file scans can expose bigger issues that may require a reset
💡 Take This With You
System file corruption is more common than most users realize—but thankfully, it’s often fixable without a complete reinstall. These built-in tools can diagnose and repair critical Windows components, helping your system stay stable, secure, and smooth. If you notice persistent weird behavior or errors that don’t trace back to hardware or applications, starting with SFC and DISM could save you hours of troubleshooting.
Fixing Boot-Time and Startup Errors
Few issues are more alarming than a PC that refuses to start up properly. Whether you’re seeing error messages before Windows loads, stuck in a restart loop, or dealing with a black screen, boot-time and startup errors can feel like a full system failure. But in many cases, these problems have fixable causes—and don’t require a full wipe or replacement.
Let’s break down the most common culprits and the steps you can take to resolve them.
What Are Boot-Time and Startup Errors?
Boot-time errors occur before Windows fully loads, often accompanied by messages like:
- ❌ “No bootable device found”
- ⚠️ “Automatic Repair couldn’t repair your PC”
- 🧱 System freeze or endless spinning circle
- 🔁 Looping restarts without reaching the desktop
Startup errors, on the other hand, occur after Windows begins to load but fail to complete, leading to login issues, partial loading, or crashes on startup.
Step-by-Step: How to Troubleshoot Boot and Startup Problems
Step 1: Disconnect External Devices
Start simple—remove USB drives, external hard disks, printers, or accessories.
- Some devices can confuse the boot order or conflict with startup
- Power off your PC fully, unplug accessories, and restart
Step 2: Try Safe Mode
Booting into Safe Mode loads a minimal set of drivers and services.
- Hold
Shiftwhile selecting Restart from the login or error screen - Navigate: Troubleshoot > Advanced Options > Startup Settings > Restart
- On reboot, press
4orF4for Safe Mode
If Safe Mode works, the issue is likely software-related—such as a startup app or driver.
Step 3: Disable Startup Programs
Too many apps launching at once can overwhelm your system.
- In Safe Mode or normal mode (if possible), press
Ctrl + Shift + Esc - Go to the Startup tab and disable unnecessary apps
- Restart normally to test performance
Step 4: Run Startup Repair
If your PC failed to boot multiple times, the Windows Recovery screen may appear automatically. Use this to initiate a startup repair:
- Select: Troubleshoot > Advanced Options > Startup Repair
- Follow the prompts and let Windows scan for startup issues
Startup Repair targets corrupted boot files or configuration issues, often resolving boot loops or blue screen errors during startup.
Step 5: Check for File System or Disk Issues
Corruption on the boot drive can prevent Windows from loading.
- Open Command Prompt from the recovery screen
- Type:
chkdsk C: /f /rand press Enter - This scans for and attempts to fix disk errors (can take time)
Boot-Time vs. Startup Errors at a Glance
| 🔍 Error Type | 🛠️ When It Happens | 💡 Typical Fix |
|---|---|---|
| “No Boot Device” | Before Windows logo appears | Check boot order, unplug USBs |
| Endless loading animation | During or after Windows logo | Use Safe Mode, disable startup programs |
| “Automatic Repair failed” | During repair screen | Use Startup Repair or scan disk |
| Black screen after login | After entering password | Try Safe Mode, roll back recent changes |
Common Mistakes to Avoid
- ❌ Unplugging during boot loops: Abrupt shutdowns during repair cycles can make things worse
- ❌ Assuming hardware failure immediately: Most startup issues are fixable without replacing parts
- ❌ Ignoring Safe Mode: If Windows won’t boot normally, Safe Mode is often the fastest way in
🧠 Remember This
Boot-time errors are intimidating, but not always disastrous. Many are caused by software conflicts, misconfigured settings, or disk problems that can be resolved with built-in recovery tools. The key is to stay calm, work through solutions one at a time, and use Safe Mode as your lifeline when the desktop is out of reach.
Diagnosing Network and Wi-Fi Error Messages
Losing internet access or seeing “No Internet” messages can be incredibly frustrating—especially if you’re trying to work, attend a virtual meeting, or stream content. Network-related error messages may sound intimidating, but they usually fall into a few clear categories that can be resolved with a systematic approach.
Let’s walk through what these errors mean and how to fix them step-by-step.
Common Network and Wi-Fi Error Messages Explained
Understanding the exact message you see can help narrow down the problem quickly. Here are a few you might encounter:
- ❌ “No internet access” — Your device is connected to Wi-Fi but cannot reach the internet
- 📶 “Connected, no internet” — Similar to above, often points to router or DNS issues
- 🌐 “Unidentified network” — Your PC doesn’t recognize the network, often due to misconfigured settings
- 🔌 “Network cable unplugged” — For wired connections, the system can’t detect a physical link
Step-by-Step: How to Fix Network and Wi-Fi Issues
Step 1: Restart Your Connection
- Disconnect from Wi-Fi and reconnect after a few seconds
- If you’re on Ethernet, unplug and replug the cable
- Restart the computer if needed
Many connection problems are temporary and resolve with a simple reset.
Step 2: Check Network Status and Adapter
- Open your PC’s network settings and verify if the adapter is enabled
- In the connection status area, see if it says “Connected” or shows limited connectivity
- Try disabling and re-enabling the adapter from the settings menu
Step 3: Run the Built-In Troubleshooter
Most systems offer a network troubleshooter that scans and automatically attempts fixes:
- Go to your system settings and select Troubleshoot
- Choose Internet Connections
- Follow on-screen instructions for automatic repairs
Step 4: Flush the DNS Cache
Sometimes, incorrect or outdated network information can block your connection:
- Open Command Prompt as Administrator
- Type
ipconfig /flushdnsand press Enter - Restart your PC and try connecting again
This clears stored network data and can fix strange, persistent issues.
Step 5: Check IP and DNS Settings
If you’ve manually entered IP or DNS settings before, verify that they’re still correct:
- Open your adapter’s properties and make sure settings are set to Obtain an IP address automatically, unless configured otherwise
- Misconfigured values can prevent your PC from talking to your router or ISP
Real-World Scenario
A remote worker repeatedly saw “Connected, no internet” each morning. After flushing the DNS and switching their adapter off and back on, the issue stopped recurring. It turned out the router was assigning addresses too slowly during early restarts, causing temporary disconnections.
When to Suspect a Router or ISP Issue
If multiple devices on the same network lose access at once, the problem may not be your PC:
- Try accessing the internet using another device
- Restart your modem or router (power off for 30 seconds, then turn back on)
- If no device connects after rebooting the network equipment, your internet provider may be experiencing an outage
Helpful Table: Error Message Cheat Sheet
| 💬 Error Message | 🔍 Likely Cause | 🔧 Suggested Action |
|---|---|---|
| “No internet access” | Router not responding | Restart router, flush DNS |
| “Unidentified network” | Invalid IP configuration | Reset adapter, check IP settings |
| “Network cable unplugged” | Physical connection issue | Reconnect Ethernet, check the port |
| “Connected, no internet” | DNS or modem problem | Flush DNS, restart router and PC |
| “Wi-Fi doesn’t have valid IP” | DHCP error | Release/renew IP address |
💡 Take This With You
Network issues often feel more complex than they are. Whether you’re facing Wi-Fi drops or a complete loss of connectivity, there’s usually a straightforward solution—especially once you understand what each error message is really saying. By methodically checking your settings, resetting your adapter, or clearing old configurations, you can often get back online in minutes.
Hardware-Related Errors: RAM, HDD/SSD, and Overheating
Not all error messages or system crashes come from software problems. Hardware issues—especially with memory, storage, or heat management—can cause your PC to slow down, freeze, or fail to boot altogether. Identifying and addressing these physical component problems is a critical part of long-term troubleshooting.
Signs You May Be Facing a Hardware Issue
Here’s how to spot if the issue isn’t just software-related:
- 🧩 Frequent or random system crashes without a clear pattern
- 🔁 Repeated Blue Screens even after software fixes
- 🔥 System suddenly shuts down or restarts, especially during heavy use
- 💾 Slow performance when opening files or saving data (could point to a failing drive)
- 🧠 Apps crash when multitasking or using a lot of memory-heavy programs
Step-by-Step: Diagnosing RAM, Drive, and Heat Issues
Step 1: Test for Faulty RAM
- What to look for: Crashes during memory-heavy tasks, failed boots, or random errors
- Action: Restart your PC and run a memory diagnostic tool (available in most systems)
- Next move: If errors are found, remove and reseat memory sticks—if problems persist, one of them may need replacing
Real-world scenario: A user noticed that every time they opened a large design file, their PC crashed. After testing, a faulty RAM module was discovered and replaced—problem solved.
Step 2: Check Your Hard Drive or SSD for Errors
- What to look for: Long boot times, files that take forever to open, or clicking noises from the drive
- Action: Run a disk checking utility from your system’s built-in tools
- Next move: If bad sectors or read/write errors appear, consider backing up data immediately and planning for drive replacement
📊 Helpful Tip: SSDs tend to fail silently (sudden issues), while HDDs often give early warnings like noise or slow reads.
Step 3: Identify Overheating Issues
- What to look for: Sudden shutdowns, system throttling, loud fans, or the PC becoming very hot to touch
- Action: Monitor internal temperatures using built-in system settings or diagnostic tools
- Prevention and fixes:
- Use your PC on a hard surface (not a blanket or cushion)
- Clean dust from vents and fans with compressed air
- Ensure airflow is not blocked around the case
- Consider adding a cooling pad (for laptops) or improving case ventilation (for desktops)
Common mistake: Keeping a laptop running for hours on a blanket, which blocks ventilation and leads to thermal shutdowns.
Quick Comparison: Hardware Error Clues & Causes
| 🛠️ Symptom | 💡 Possible Hardware Issue | 🔧 Suggested Action |
|---|---|---|
| Random crashes, failed boots | Faulty RAM | Run memory diagnostic, test/reseat RAM |
| Slow boot times, long file loading | Aging or failing HDD/SSD | Run disk check, backup data immediately |
| Sudden shutdowns, hot system | Overheating | Clean vents, improve airflow, monitor temp |
💡 Take This With You
Hardware issues might feel more intimidating than software ones, but the symptoms are usually consistent and diagnosable. Whether it’s a flaky stick of RAM or a drive reaching the end of its life, recognizing the signs early helps you prevent data loss or permanent damage. Keep your system cool, clean, and regularly backed up—and you’ll be ready for any hardware hiccup that comes your way.
How Power Settings Affect PC Performance
It might surprise you, but your PC’s power plan plays a major role in how fast or slow it performs—especially if you’re using a laptop. Power settings determine how much energy your system uses, which directly influences processor speed, screen brightness, sleep behavior, and overall responsiveness.
What Power Settings Actually Control
Power settings aren’t just about saving battery. They influence key performance behaviors:
- ⚙️ Processor speed: In low-power modes, your CPU may be throttled to run slower, reducing performance to save energy.
- 🌡️ System cooling: On laptops, fan use may be limited in power-saving plans, allowing more heat buildup and triggering automatic slowdowns.
- 🌙 Sleep/hibernate timing: Aggressive settings might put your system to sleep too quickly, interrupting downloads or background tasks.
- 🔋 Battery-saving features: Certain hardware components (like Wi-Fi adapters or hard drives) may reduce their power draw, affecting performance.
Step-by-Step: Adjusting Power Settings for Better Performance
Step 1: Open Power Options
- Press
Windows + R, typepowercfg.cpl, and hit Enter - You’ll see available power plans like Balanced, Power Saver, or (if visible) High Performance
Step 2: Choose a Performance-Focused Plan
- Select Balanced for a good mix of power saving and speed
- Or switch to High Performance when plugged in for tasks like editing, gaming, or video streaming
⚠️ On some systems, High Performance may be hidden under “Show additional plans.” Select it manually if needed.
Step 3: Customize Advanced Power Settings
- Click “Change plan settings” next to your chosen plan
- Then select “Change advanced power settings”
- Here, you can:
- Set the processor to run at 100% minimum for consistent performance
- Prevent hard drives from turning off too quickly
- Adjust sleep timers to fit your workflow
When to Use Which Plan
| ⚡ Use Case | 🔌 Recommended Power Plan |
|---|---|
| Everyday tasks, mixed usage | Balanced |
| Gaming, editing, heavy work | High Performance |
| On-the-go, conserving battery | Power Saver |
Common Power Plan Mistakes to Avoid
- ❌ Leaving it on Power Saver all the time – This slows your CPU, dims your screen, and may delay background tasks.
- ❌ Never customizing sleep settings – Your PC may interrupt downloads or updates if it goes to sleep too soon.
- ❌ Forgetting to switch back – If you use High Performance constantly, your battery may drain much faster on a laptop.
🧠 Remember This
Power settings might seem minor, but they’re a hidden switch between sluggish and snappy. If your PC feels slow for no clear reason, it could be operating under a restrictive plan—especially after system updates or changes. A quick adjustment can unlock noticeably faster performance without any upgrades or repairs.
Is Your HDD Slowing You Down? Upgrade to an SSD
If your PC feels painfully slow—especially during startup, loading programs, or opening large files—your hard disk drive (HDD) may be the reason. Traditional HDDs rely on spinning parts that physically search for data, which takes time. Solid-state drives (SSDs), on the other hand, access data electronically, making them much faster and more responsive.
How to Tell If Your HDD Is a Performance Bottleneck
Some key signs your old drive might be dragging your PC down:
- 🐌 Long boot times (taking over a minute to reach the desktop)
- 🕐 Apps take ages to load or freeze briefly during launch
- 🔄 Frequent hard drive noise while loading files (grinding or clicking)
- 📂 Slow file transfers or delays when opening folders with many files
Real-World Scenario: A user with a 5-year-old laptop reported sluggish performance, especially when switching between apps. Task Manager showed high disk usage even when idle. After switching to an SSD, the system booted in seconds and programs opened instantly.
HDD vs SSD: Speed Comparison Table
| 🚀 Task | 🖴 HDD (Traditional Drive) | 💾 SSD (Solid-State Drive) |
|---|---|---|
| Boot Time | 45–90 seconds | 10–20 seconds |
| Launching Programs | 10–30 seconds | 2–5 seconds |
| File Transfer (1GB folder) | ~60–90 seconds | ~10–15 seconds |
| Noise & Vibration | Noticeable | Silent (no moving parts) |
| Power Usage (Laptop impact) | Higher | Lower |
Steps to Upgrade to an SSD (Beginner-Friendly Overview)
You don’t need to be a tech expert to speed things up with a storage upgrade:
Step 1: Confirm What You Have
- Open Task Manager > Performance tab > Disk
- Look for labels like “HDD” or “SSD” under the disk name
Step 2: Backup Important Files
- Always save personal data before upgrading storage
- Use an external drive or cloud storage as a safety net
Step 3: Choose a Compatible SSD Type
- Most older PCs use 2.5″ SATA drives, while newer ones may support M.2/NVMe for faster performance
- Check your system’s specifications or user manual for compatibility
Step 4: Replace the Drive and Reinstall Windows
- This typically involves unscrewing a panel, unplugging the old drive, and installing the new SSD
- After installation, reinstall the operating system and restore your files
💡 Tip: If you’re unsure about the physical replacement, many users choose to get help from a tech-savvy friend or technician.
Realistic Expectations After Upgrading
After switching to an SSD, many users report:
- ⚡ Faster boot-up (often under 20 seconds)
- ⚙️ Smooth multitasking, especially when switching between apps
- 📁 Quick file searches and program loads
- 💻 Extended lifespan for older PCs without other upgrades
💡 Take This With You
Storage is often overlooked when diagnosing performance issues—but it can be the biggest difference-maker. HDDs are prone to slowdowns over time due to mechanical wear. SSDs, being entirely electronic, not only reduce wait times but also breathe new life into aging systems. If your computer feels stuck in the past, a modern drive could be the future it needs.
Outdated Software and Drivers: The Hidden Bottlenecks
When your PC starts lagging or behaving unpredictably, you might think it’s hardware-related—but the real culprit is often much simpler: outdated software or drivers. These silent bottlenecks can cause crashes, errors, slowdowns, and even hardware miscommunication.
How Outdated Software Affects Performance
Running older versions of apps or system utilities can introduce instability. Here’s why:
- ⏳ Missing performance optimizations: Updates often include tweaks that make software run faster and more efficiently
- 🐞 Unpatched bugs: Developers routinely fix known bugs through updates; skipping them can leave problems unresolved
- 🔐 Security holes: Outdated software may lack critical security patches, leaving your system vulnerable
- ⚙️ Incompatibility with system changes: New Windows updates may clash with older software, causing crashes or glitches
Real-World Scenario: A user noticed that every time they opened large files, their PDF viewer would freeze. The issue traced back to an older version of the app that lacked a memory optimization update released months prior.
The Role of Drivers in System Stability
Drivers act as translators between your hardware and Windows. If these go out of date, problems arise—especially after a major Windows update. Symptoms can include:
- 🚫 Devices not working or showing yellow exclamation marks in Device Manager
- 🔇 Missing sound or no network connectivity
- 🖼️ Display flickering or incorrect resolution
- 🐢 Sluggish or erratic performance from peripherals
Common Misstep: Users often think a piece of hardware is broken when it’s just running on an outdated driver that no longer plays nicely with the OS.
Step-by-Step: Keep Software and Drivers Updated
Step 1: Set Up Auto-Updates
- Enable automatic updates in your system settings to ensure the latest features and patches are installed
- Many programs have this option under Settings > Updates—check and turn it on
Step 2: Manually Check for Software Updates
- Open your app and check the Help or About section
- Look for a “Check for Updates” option and follow the prompts
Step 3: Inspect Device Manager for Driver Status
- Press
Win + Xand select Device Manager - Look for yellow warning symbols beside any devices
- Right-click a flagged device and select Update driver
Step 4: Use the Operating System’s Built-In Tools
- Your PC includes tools to check for system updates that often include important driver updates
- Be sure to run these checks regularly or schedule them weekly
Signs It’s Time to Update
| ⚠️ Symptom | 🛠️ Likely Cause |
|---|---|
| Audio or Wi-Fi cuts out randomly | Outdated sound or network drivers |
| Apps crash after OS updates | Software not optimized for the new OS |
| Display looks blurry or stretched | Graphics driver needs updating |
| USB or external drives not detected | Missing or broken driver |
💡 Take This With You
Many common PC problems—freezes, crashes, slow performance—aren’t hardware issues at all. They stem from running outdated versions of essential software or hardware drivers. Staying current keeps your system compatible, secure, and smooth. Make updates part of your monthly maintenance, and you’ll avoid a host of unnecessary frustrations.
Bloatware: The Silent Performance Killer
Bloatware refers to unnecessary pre-installed or unused software that quietly drains your PC’s resources. These programs may not seem harmful at first glance, but over time, they can bog down your system, extend boot times, and eat up valuable memory.
What Exactly Is Bloatware?
Bloatware comes in several forms:
- 🧩 Trial software: Installed by default, often unused after expiration
- 🖼️ Promotional tools: Apps bundled by manufacturers that offer little long-term value
- 🔄 Redundant utilities: Software that duplicates functionality already built into Windows
- 🛠️ Unrecognized background services: Programs running quietly in the system tray without your knowledge
Real-Life Scenario: A user noticed their brand-new PC took over 90 seconds to boot. After reviewing installed apps, they found over 20 unused programs running at startup. Removing the unnecessary ones cut boot time by more than half.
Signs Your PC Is Loaded With Bloatware
- Slow startup or shutdown times
- System tray cluttered with icons
- Frequent pop-ups from apps you never use
- High memory or CPU usage when idle
Step-by-Step: Remove Bloatware Safely
Step 1: Review Installed Apps
- Go to Settings > Apps > Installed apps
- Sort by install date or size to find recently added or space-hogging apps
Step 2: Uninstall Unwanted Programs
- Select each program you don’t recognize or no longer use
- Click Uninstall, then follow the on-screen steps
Step 3: Disable from Startup
- Open Task Manager (
Ctrl + Shift + Esc) and navigate to the Startup tab - Right-click and disable any unnecessary startup items
Step 4: Clean Up Scheduled Tasks (Advanced)
- Open Task Scheduler from the Start menu
- Review any tasks set to run automatically and disable anything unfamiliar or unneeded
What to Watch Out For
- ❗ Avoid removing drivers, system utilities, or essential components by mistake
- ❗ Not all unfamiliar apps are bloatware—search the name before deleting
- ✅ If in doubt, disable before uninstalling so you can monitor system behavior
💡 Take This With You
Bloatware often hides in plain sight, quietly chipping away at your system’s speed. Taking a few minutes to review and remove what you don’t need can free up memory, shorten boot time, and improve overall responsiveness. Keep your PC lean, and it will run cleaner.
When to Reset or Replace Your PC
Sometimes, no amount of tweaking, cleaning, or upgrading can fully bring an aging or glitchy PC back to life. That’s when it’s time to ask: should you reset the system, or is it finally time for a replacement?
This decision depends on a few key factors—performance, age, hardware limitations, and cost-benefit comparisons.
Signs It’s Time to Consider a Full Reset
A reset (also called a system refresh) reinstalls Windows while optionally keeping your personal files. It gives your system a clean slate without requiring new hardware.
Good candidates for a reset:
- 🌀 Frequent software errors or random freezes with no clear cause
- 🐢 Noticeably slow performance despite cleanup and optimization
- 🔁 Recurring malware infections that keep coming back
- 🔒 Login issues, corrupted user profiles, or broken settings
- 🧹 You want to start fresh without losing your personal files
How to do it safely:
- Back up all personal files to an external drive or cloud storage
- Make note of apps and licenses you may need to reinstall
- Use the built-in reset tool (found under Settings > System Recovery)
A reset can often breathe new life into a struggling system—especially when the underlying hardware is still solid.
When It’s Time to Replace the PC
No system lasts forever. If your PC is past a certain age or struggling to meet modern demands, replacing it may be more cost-effective than repairing or upgrading.
Key signs replacement may be smarter:
- 🧓 The PC is more than 5–7 years old
- 🧱 It can’t run current apps or the latest version of Windows
- 🧩 You’ve already upgraded memory or storage but issues persist
- ⚙️ Startup takes minutes, not seconds, and daily tasks feel sluggish
- 🔌 Hardware failures (like random shutdowns or failed ports) are common
Scenario: A home user upgraded their 8-year-old laptop with more RAM and a new drive, but it still struggled with video conferencing and photo editing. The CPU was simply too old to keep up. Replacing the system led to faster load times, smoother multitasking, and a much better overall experience.
Reset vs. Replace: A Simple Comparison
| Factor | Reset 🧼 | Replace 💻 |
|---|---|---|
| Cost | Low to none | High (new device purchase) |
| Time to complete | 1–2 hours | Setup time + data migration |
| Keeps your device? | ✅ Yes | ❌ No (but you can reuse peripherals) |
| Boost in performance | Moderate | High (if buying a modern system) |
| When to consider | Software-only issues | Aging hardware or constant failures |
Questions to Ask Before Replacing
- Have you already upgraded the memory or storage, but it’s still slow?
- Is your system compatible with the latest OS updates?
- Are apps crashing or refusing to open due to unsupported specs?
- Does the hardware show signs of physical wear (noisy fans, cracked casing, unreliable charging)?
- Do you spend more time fixing issues than getting work done?
If most of your answers lean “yes,” it might be time to shop for a replacement.
🧠 Remember This
Resetting your PC is a great first step when software is the issue—but it won’t fix slow or outdated hardware. If your machine is more than a few years old and struggles to handle modern workloads even after resets or upgrades, replacing it could save you time, frustration, and even money in the long run. Evaluate the signs, compare your options, and make the choice that best supports your needs and usage style.
How to Prevent Future Error Messages
Once you’ve cleaned up existing issues and optimized your system, the next step is making sure those pesky error messages don’t come back. Prevention is all about building good maintenance habits, staying proactive, and keeping your system healthy over time.
Start with Smart User Habits
Many common errors come from everyday usage patterns that are easy to fix with a few tweaks:
- 🧹 Keep unused programs off your system: Regularly uninstall apps you no longer use
- 🛑 Avoid interrupting updates: Shutting down your PC mid-update can corrupt files
- 🔐 Use standard user accounts when possible: This limits risky changes to system settings
- 🗂️ Organize downloads and documents: Keeping files in order helps you avoid misplaced data or accidental deletions
Example: A home user kept getting file errors because they often saved everything to the desktop and forgot to move them. Once they started using clearly labeled folders, those issues stopped showing up.
Perform Routine Maintenance
Just like a car, your PC runs best with regular upkeep. Here’s what to add to your routine:
Weekly Tasks:
- Restart your PC at least once a week to clear temporary memory issues
- Review open apps and browser tabs—too many open at once can slow things down
Monthly Tasks:
- Run Disk Cleanup or Storage Management to remove junk files
- Review your startup programs and disable any new entries that aren’t essential
- Check for system or feature updates manually if auto-updates are paused
Every 3–6 Months:
- Physically clean your computer’s vents to prevent overheating
- Review installed apps for potential bloatware or unnecessary tools
- Back up important files to an external drive or secure location
20
Monitor System Health Over Time
Staying alert to early signs of trouble can help you catch problems before they get worse.
Keep an eye out for:
- Unexpected slowdowns during basic tasks
- Apps crashing or closing without warning
- Unusual error pop-ups after installing something new
When these issues pop up repeatedly, it’s time to investigate—before they snowball.
Use Built-In Tools the Smart Way
Your operating system includes helpful diagnostics and system checks. You don’t have to run them daily, but they’re good tools to use when something feels “off”:
- System file checks (for corrupted OS files)
- Startup repair (if boot issues happen again)
- Troubleshooters for network, update, or audio issues
🛠️ These are designed for non-technical users—most require just a click to begin and can automatically apply fixes.
Safe Usage Tips to Avoid Future Errors
- ⛔ Don’t force shut down during updates or file transfers
- ⚠️ Avoid downloading files from unknown sources
- 📎 Before installing new apps, consider whether you really need them
- 🧪 Test new software in a limited environment before making big changes
Real-World Reminder: A user installed several new tools back-to-back and didn’t realize one was conflicting with system services. After a system reset, they decided to test one tool at a time moving forward.
🔁 Putting It All Together
Preventing error messages isn’t about being a computer expert—it’s about using your PC with care and staying ahead of potential issues. With routine check-ins, smart usage habits, and a bit of cleanup now and then, you can enjoy a smoother, more reliable experience with fewer interruptions and frustrating alerts.
Conclusion: Stay Calm, Stay Smart—You Can Solve Most PC Errors
Whether it’s a cryptic error code, a freezing app, or a stubborn blue screen, PC issues can feel overwhelming—especially when they strike at the worst time. But here’s the good news: most problems have clear causes and practical solutions that don’t require advanced technical skills.
What You’ve Learned
Throughout this guide, you’ve explored how to:
- Decode and understand common error messages without panic
- Fix major problems like boot errors, DLL issues, and update failures step by step
- Use built-in tools to repair corrupted files and restore stability
- Spot performance bottlenecks from outdated software, failing hardware, or power settings
- Prevent future problems with smart habits and regular maintenance
And maybe most importantly, you’ll learn to view system warnings as helpful alerts—not final failures—and now you know how to respond with confidence.
Final Tips for Troubleshooting Success
- 🧭 Start with the basics: Restarting, checking updates, and freeing up memory can solve more than you think
- 🔍 Take time to read the error: Often, the message itself gives clues to the cause
- 🧱 Fix one layer at a time: From software to drivers to hardware, troubleshoot methodically
- 🧼 Clean, reset, or refresh when needed: A clean system runs better, period
- 📆 Be proactive: Prevention is your best tool—regular checks and smart use go a long way
🧠 Remember This
Troubleshooting isn’t about being perfect—it’s about being patient, curious, and prepared. Most PC problems aren’t permanent, and now you have a clear framework to fix them. Save this guide and revisit it anytime you need a refresher. A calm, step-by-step approach can solve most PC issues.
If your system is still struggling after everything, it might be time to consider a full reset or a replacement—especially if it’s over five years old. But in most cases, the right fix is just a few steps away.
Stay calm. Stay smart. You’ve got this.
📌 Privacy Note: This article is for general informational purposes only. It does not collect personal data, and no professional services are being sold through this guide.