Introduction: Why You Don’t Need to Be a Pro to Diagnose Your PC
Few things are more frustrating than a slow, unresponsive, or randomly crashing PC. For many Windows users, the natural instinct is to either ignore the issue or wait until it becomes so severe that professional help is unavoidable. But what if many of these issues could be detected early using free diagnostic tools already built into your Windows system?
The truth is, you don’t have to be a tech expert to figure out what’s wrong with your PC. By learning to use basic diagnostic tools, you can often spot problems before they cause data loss or hardware failure. These tools require only a few minutes of time and some curiosity. In fact, over 60% of Windows users surveyed in late 2024 admitted they didn’t check their system health until something broke.
This guide will walk you through five categories of essential diagnostic tools every Windows user should understand. From performance monitoring to temperature checks, you’ll learn what these tools do, when to use them, and how to interpret what they tell you. Let’s get started with the basics.
Understanding PC Diagnostics: What These Tools Can (and Can’t) Do
Before diving into the types of tools available, it’s important to clarify what diagnostics mean in the context of everyday computer use. PC diagnostics refer to the process of identifying potential performance issues, hardware problems, or system conflicts through structured observation and reporting. These tools generally fall into three categories: monitoring, testing (or stress-testing), and reporting.
Diagnostics help you understand what’s happening beneath the surface of your system. For instance, they can show you how much memory is being used, whether your hard drive is struggling, or if temperatures are creeping into dangerous territory. While they can’t physically fix the problem, they give you the clues you need to take the right steps.
Most modern Windows systems already include built-in utilities for monitoring CPU usage, available RAM, disk performance, and system errors. These tools are user-friendly and safe to run without needing any downloads or external software.
Diagnostics are most useful when you’re experiencing slowdowns, crashes, freezes, or unexpected shutdowns. However, they’re also powerful preventive tools when used regularly. A user once suspected malware due to system lag, but diagnostics revealed a background app consuming excessive CPU—a much simpler fix.
📌 Why It Matters: Understanding diagnostics demystifies your system’s behavior, helping you react before a minor hiccup becomes a major headache.
Tool Type #1 – Performance Monitoring Tools for Windows PCs
Performance monitoring is the front line of PC diagnostics. These tools track real-time resource usage, giving you a live snapshot of how your system is functioning. If your PC randomly slows down or freezes while multitasking, performance monitoring is where to begin.
These tools show you how your CPU, RAM, and disk are being used. You can detect spikes in usage, see which applications are demanding the most resources, and identify bottlenecks. For instance, if your CPU usage is near 100% but you’re only browsing the web, something unusual is going on.
When to use performance monitors:
- Your PC slows down during basic tasks
- You experience delays switching between applications
- Startup takes longer than usual
🔎 What to monitor:
- CPU usage: High levels for extended periods signal a resource drain
- Memory (RAM): Low availability may cause programs to crash or lag
- Disk activity: Continuous 100% disk usage can slow everything down
📌 Mini Scenario: A user notices delays when switching tabs in their browser. A quick look at the performance monitor reveals 20+ startup apps consuming memory. After disabling a few non-essential ones, the system speeds up.
📊 Optional Table:
| Symptom | What to Monitor | What It Reveals |
|---|---|---|
| Random slowdowns | CPU & memory usage | App overload or hardware limits |
| File lag | Disk activity spikes | Storage under stress or errors |
💡 Take This With You: Performance monitors give you an immediate health snapshot and are perfect for troubleshooting in real time.
Tool Type #2 – Storage and Disk Health Checkers
Storage is critical to your PC’s stability. Problems here often show up as long boot times, corrupted files, or frequent freezing. Disk health tools scan for file system errors, check read/write speeds, and monitor drive condition.
Symptoms to watch for:
- File access feels slow
- Apps take longer to open
- The system fails to boot occasionally
Basic diagnostic checks can alert you to early disk failure. These checks include verifying file system integrity and scanning for bad sectors. The tools won’t fix a dying drive, but they give you the warning signs you need to act before data loss occurs.
What these tools can reveal:
- File system errors or corrupted sectors
- Drive read/write failures
- Aging drives nearing the end of their life
💡 Real-World Tip: A user ignored boot delays and slow loading apps. A storage health check revealed disk errors. Backups were made just in time before the drive stopped working completely.
📌 Why It Matters: Checking your storage health is essential for data safety and performance consistency.
Tool Type #3 – Memory and RAM Diagnostics
Faulty memory is a common cause of Blue Screen errors, random crashes, and apps closing unexpectedly. RAM diagnostics test your system’s memory under different loads to catch inconsistencies or errors.
When should you run a RAM test?
- Frequent system crashes (especially under load)
- Blue Screens with memory-related codes
- Freezing while multitasking
These tools perform a write/read cycle on your RAM modules to check for failing memory cells. While they can’t physically fix faulty RAM, they can pinpoint whether it’s the cause of your issues.
📌 Common Warning Signs:
- “Page fault” or “memory management” STOP errors
- Freezing or rebooting mid-task
📝 Mini Scenario: A student’s laptop crashed during online classes. RAM testing revealed one faulty stick. After replacing it, the system ran smoothly without further problems.
💡 Take This With You: Regular memory tests help ensure your system can handle multitasking without freezing or crashing unexpectedly.
Tool Type #4 – Thermal and Temperature Monitoring
Heat is a silent PC killer. Overheating leads to thermal throttling, decreased performance, and eventually hardware damage. Monitoring temperatures can prevent long-term wear and unexpected shutdowns.
When your system runs too hot, it will slow down automatically to protect itself—this is called throttling. You might hear fans running loudly or notice your device slowing down during high-performance tasks like gaming or video editing.
What to monitor:
- CPU temps: Should typically stay below 70°C under load
- GPU temps: Can safely operate up to 80°C
- SSD/HDD temps: Generally safe under 50°C
📊 Optional Table:
| Component | Normal Range (°C) | Danger Zone (°C) |
|---|---|---|
| CPU | 35–70 | 85+ |
| GPU (gaming) | 50–80 | 90+ |
| SSD/HDD | 30–50 | 60+ |
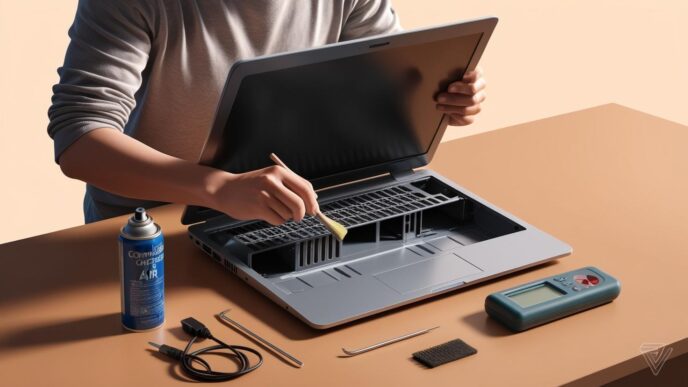
📝 Scenario: A remote worker’s laptop shut off after long video calls. A quick check showed CPU temps near 90°C. Cleaning the vents and using a hard surface resolved the issue.
📌 Why It Matters: Monitoring your system’s temperature helps prevent avoidable hardware damage from heat stress.
Tool Type #5 – System History, Crash Logs, and Reliability Tools
Sometimes your PC won’t slow down until something crashes completely. That’s where system history and crash log tools come in. These logs offer a timeline of past errors, update issues, and application crashes.
These tools don’t just show what went wrong—they also show when. You can trace problems back to recent software changes, failed updates, or driver installs.
When to check these logs:
- After a BSOD or sudden reboot
- When apps freeze or close without warning
- If you experience repeat problems with a specific program
🧠 Add Mini Case: A user experienced multiple BSODs after updating their system. Reviewing the crash log showed the same update failing repeatedly. Rolling back the update fixed the issue.
💡 Take This With You: Your system’s history is a goldmine for understanding repeat errors. Don’t ignore it.
How to Read the Data Without Getting Overwhelmed
Diagnostics can be intimidating at first, but the key is not to overreact. High CPU usage for a few seconds or a single memory error isn’t always a crisis. Instead, look for patterns.
What to focus on:
- Normal vs. critical alerts: Some spikes are temporary
- Consistency: Repeated issues suggest something deeper
- System behavior: Is the slowdown constant or tied to certain actions?
Tips for interpretation:
- Don’t assume one reading equals a broken part
- Compare performance when idle vs. under load
- Use your system like normal for a few hours, then review the data
💡 Tip: Diagnostics are most helpful when tracked over time. Trends show you what’s really changing, not just what happened once.
When to Use These Tools — and How Often
You don’t need to run diagnostics daily, but you should build them into your monthly maintenance habits. Think of them as regular checkups—especially helpful after big updates or hardware changes.
When to run checks:
- After experiencing crashes or system instability
- Before and after installing major updates
- Once a month as preventive care
📋 Optional Table:
| Diagnostic Type | When to Run | Why It Helps |
|---|---|---|
| Memory Test | After crashes or BSOD | Catches RAM faults |
| Disk Check | Monthly or after slowdowns | Detects drive errors early |
| Temp Monitor | During heavy tasks | Prevents thermal damage |
🧠 Remember This: Small, routine checks prevent big problems. A few minutes a month can save hours of frustration.
Bonus: Signs You Should Stop DIY and Call a Technician
While diagnostics tools empower users to solve many problems, some symptoms point to deeper hardware failure or electrical issues best left to professionals.
Signs you should seek expert help:
- You smell something burning or see physical damage
- Your PC won’t power on or displays nothing at boot
- BSODs continue even after multiple diagnostic attempts
- Strange clicking noises from drives or overheating despite cleaning
📝 Add: Always document what tools you used and what you found. A log of error codes and test results can help a technician diagnose your problem faster and more accurately.
📌 Why It Matters: Knowing your limits can prevent accidental damage and make professional fixes quicker and more cost-effective.
FAQ – DIY Diagnostics for Windows PC Users
Can I damage my PC running diagnostics?
No. Built-in diagnostics tools are safe and designed for general users. They don’t modify your system, only observe.
How do I know if it’s hardware or software?
If the issue persists in Safe Mode or after a clean reboot, it could be hardware. Consistent symptoms under load are also a clue.
Will these tools slow my system while running?
Some may temporarily use resources, especially during memory or disk tests. It’s best to run them when you’re not doing anything intensive.
Can I use these tools even if I’m not tech-savvy?
Absolutely. Most tools are menu-driven and easy to follow. Start with performance and reliability monitors to build confidence.
💡 Take This With You: Diagnostics aren’t just for IT pros. Anyone can learn to spot issues and prevent disaster with a little practice.
Conclusion: You’re the First Line of Defense for Your PC
You don’t need expensive services or advanced software to understand your PC’s health. With just the free tools built into Windows, you can track performance, catch issues early, and avoid many common problems altogether.
The key is consistency. A few minutes a month running these diagnostics can spare you hours of downtime, costly repairs, or data loss. Best of all, they empower you to take control of your technology instead of reacting to emergencies.
📣 Save this guide for future use and use it monthly as part of your regular PC checkup routine. It’s a practical reference for anyone who wants to keep their system running smoothly. Prevention takes minutes. Recovery could take days.
📌 Privacy Note: This article is for general informational purposes only. It does not collect personal data, and no professional services are being sold through this guide.
