Introduction: Why DIY Hardware Diagnostics Matter More Than Ever
If your computer has been freezing, crashing, or slowing down without warning, you’re not alone. Many users quickly assume their software is to blame—when in reality, the root cause is often hardware-related. Issues like failing RAM, an overheating CPU, or a degrading hard drive are surprisingly common and can quietly degrade your system over time. The good news? You don’t need to be a computer technician or spend money on expensive tools to pinpoint the problem.
This comprehensive guide walks you through a step-by-step approach to identifying hardware issues using simple visual checks and built-in Windows tools. Whether you’re on a desktop or laptop, these DIY diagnostics are practical, safe, and beginner-friendly. With just a bit of time and patience, you can avoid unnecessary upgrades and take back control of your system’s performance.
📊 According to recent PC maintenance reports, over 40% of recurring system performance issues in 2024 were linked to hardware—not software. Early diagnosis means fewer surprises, less downtime, and longer hardware lifespan.
Recognizing the Signs of Hardware Trouble on Windows PCs
Hardware issues tend to reveal themselves differently than software bugs. Software problems are often repeatable and linked to specific programs or actions. In contrast, hardware problems can be more random and harder to pin down—until they escalate. This section will help you spot the most common red flags before they become full-blown failures.
Common warning signs:
- Unexplained restarts or crashes
- Overheating or loud fan noises
- Visual glitches (screen artifacts, flickering)
- Long boot times or failed startups
- Frequent Blue Screen of Death (BSOD) messages
Intermittent problems:
These often signal degrading hardware. For example:
- A hard drive may fail only under load.
- Faulty RAM might crash your system during multitasking.
- GPUs may show visual errors intermittently before dying completely.
📌 Real-World Example: A user’s PC restarted randomly when watching videos. After testing, a failing RAM stick—not a browser issue—was identified.
📌 Why It Matters: Spotting early symptoms allows for faster resolution and prevents data loss or extended downtime.
Step 1 – Start with a Visual Hardware Inspection
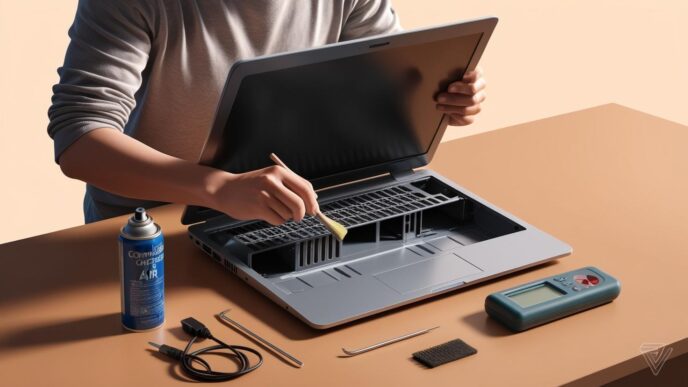
Before diving into diagnostics tools, begin with a basic physical inspection. This step can often reveal the issue without any software at all. Dust buildup, loose cables, or visible damage are simple but common causes of hardware instability.
Checklist for Visual Inspection:
- 🔌 Disconnect all power sources and shut down the computer.
- 💨 Check and clean internal dust around fans, vents, and heatsinks.
- 🛠️ Ensure all components are properly seated, especially RAM and graphics cards.
- 🔍 Look for signs of damage: burnt smell, swollen capacitors, loose connectors.
🧠 Remember This: A clogged vent or loose RAM stick can mimic a serious system error. Fixing it might be as simple as reseating or cleaning.
Step 2 – Test Your RAM (Memory Diagnostics Basics)
Memory problems are a leading cause of system crashes, freezes, and BSODs. Fortunately, testing your RAM is straightforward.
Symptoms of RAM issues:
- Random restarts
- Programs crash without reason
- BSODs with memory-related error codes
Steps to test your RAM:
- Open the built-in Windows memory diagnostic tool.
- Follow prompts to restart and scan your system.
- Let the test run—it may take 10–30 minutes.
- Review the results once Windows restarts.
📝 Mini Case: A college student’s laptop froze every time they opened more than two apps. A memory scan revealed faulty RAM, which was replaced to resolve the issue.
💡 Take This With You: Always rule out memory problems early. They’re easy to miss—but also easy to test.
Step 3 – Check Hard Drive Health and Performance
Your hard drive is responsible for storing your operating system, apps, and files. When it begins to fail, your whole system can slow down or become unstable.
Signs of a failing drive:
- Clicking or grinding noises
- Frequent read/write errors
- Slow file access or boot times
- Random system hangs
DIY steps:
- Use built-in scan tools to check disk integrity.
- Run a scan for bad sectors or corrupted system files.
- Monitor boot-up times and file transfer speeds.
📊 Optional Table:
| Symptom | Likely Problem | Action to Take |
|---|---|---|
| Slow file access | Failing HDD/SSD | Run scan and backup data |
| Repeated disk errors | File system issue | Run file check tool |
| Clicking noises | Physical damage | Power off and replace |
🔁 Putting It All Together: Regular disk scans help detect problems before your files become unrecoverable.
Step 4 – Monitor System Temperatures and Cooling Issues
Thermal issues are among the most common causes of computer slowdowns, unexpected shutdowns, or even hardware damage.
Heat-related symptoms:
- System throttles or slows during multitasking
- Loud fan noise under light usage
- Unexpected shutdowns or freezes
- Laptop base feels extremely hot
How to check and cool your system:
- Access temperature data through BIOS or built-in tools
- Clean vents and fans regularly
- Avoid soft surfaces that block airflow
- Ensure your fans are spinning and unobstructed
📌 Real-Life Scenario: A user editing videos experienced stutters and shutdowns. Dust had clogged the CPU fan, leading to overheating. After cleaning, the system ran smoothly.
💡 Take This With You: Heat is silent but deadly. Keeping your PC cool can extend its life by years.
Step 5 – Isolate Graphics Card or Display-Related Issues
Graphics card failures can be tough to diagnose because they often mimic software or monitor issues. But there are signs you can check.
Common GPU problems:
- Screen flickers or artifacts
- Driver crashes or black screens
- System crashes during gaming or video playback
Diagnostic steps:
- Test another monitor to rule out display issues
- Look for glitches during boot (before Windows loads)
- Monitor temperature and usage during normal use
📋 Tip Box:
- 👁️ Flickering before login? Likely hardware.
- 📉 High GPU temps? Could indicate a failing fan or bad thermal paste.
- 💻 Try an external monitor to isolate screen vs. GPU problems.
📌 Why It Matters: The GPU powers your display experience. Early detection can prevent data loss and costly component failure.
Step 6 – Identify BIOS or Motherboard-Related Problems
When core components fail to communicate properly, the issue often lies with the motherboard or BIOS configuration.
Signs of BIOS/motherboard issues:
- PC powers on but doesn’t boot
- Boot loop with no display
- Beeping error codes at startup
- Hardware not detected (e.g., RAM, drives)
What to do:
- Access BIOS and reset to default settings
- Check boot device order and disable unused devices
- Look up POST (Power-On Self-Test) beep codes
📝 Real-World Tip: A user upgraded RAM and encountered boot failure. Resetting the BIOS fixed the memory compatibility issue.
🔁 Putting It All Together: BIOS settings are easy to misconfigure—but just as easy to reset. When in doubt, revert to defaults.
When to Stop and Seek Professional Help
DIY diagnostics can go a long way—but some signs require immediate expert attention.
When to stop:
- Burnt smell, electrical sparks, or visible smoke
- No power at all despite working outlets
- Loud clicking from internal components
- System remains completely unresponsive
What to prepare before repair:
📋 Mini Checklist:
- 🔄 Tried visual and software-based diagnostics
- 📋 Recorded symptoms and error messages
- 🧯 Noticed signs of physical damage
- 💾 Backed up important data if possible
🧠 Remember This: Knowing when to escalate an issue saves time and protects your valuable data from being lost.
FAQ – Diagnosing Hardware Problems at Home (Windows PCs & Laptops)
How do I know if it’s hardware or software?
Hardware issues tend to be random and persistent—especially under load—while software problems often follow repeatable patterns tied to specific apps.
Is it safe to open my laptop to clean dust?
Yes, but proceed carefully. Use anti-static tools and only open user-accessible compartments. Avoid damaging warranty seals.
Can a faulty power supply cause random shutdowns?
Absolutely. Inconsistent voltage delivery can cause restarts or boot failures.
How often should I run hardware checks?
Perform checks every 3–6 months—or anytime performance declines suddenly.
💡 Take This With You: Basic maintenance and awareness go a long way in preserving system stability and avoiding preventable breakdowns.
Conclusion: Confidence in Hardware Starts with DIY Diagnostics
Diagnosing hardware issues doesn’t require a degree in computer science. With visual inspections, built-in diagnostic tools, and a bit of patience, you can pinpoint many issues before they cause major disruptions.
From faulty memory to overheating components, this guide has walked you through proven steps to identify and address hardware trouble—without needing specialized equipment.
📣 CTA: Bookmark this guide and revisit it whenever your system feels “off.” Share it with a friend or coworker who always seems to be one crash away from disaster.
📌 Privacy Note: This article is for general informational purposes only. It does not collect personal data, and no professional services are being sold through this guide.


