Overheating is one of the most common yet underestimated problems that can plague both laptops and desktops. It can lead to sluggish performance, system crashes, shortened hardware lifespan, and even permanent data loss. Whether you’re a student, remote worker, gamer, or office professional, keeping your computer cool is essential for safe and smooth performance.
This comprehensive guide explores everything you need to know about diagnosing, fixing, and preventing overheating. From proper ventilation and active cooling solutions to real-world case studies and expert maintenance tips, you’ll gain the tools to protect your system and improve its longevity.
What Causes a Computer to Overheat?
Understanding why your computer overheats is the first step in solving the problem. Most causes are environmental or mechanical—and often, they build up slowly over time. Here are the most common contributors to overheating and how they can impact your system.
Poor Airflow or Blocked Vents
When air can’t move freely in and out of your device, heat builds up fast. This is especially common with laptops used on soft surfaces like beds or couches that block intake vents. Desktops crammed into tight spaces or surrounded by clutter also suffer from restricted airflow.
Tip: Always place your device on a hard, flat surface and keep surrounding areas free of obstructions.
Dust Accumulation
Dust acts like a thermal blanket. It settles inside vents, fans, and on top of key components like the CPU and GPU, trapping heat that would otherwise be dispersed. Over time, dust buildup can completely block airflow, leading to dangerously high internal temperatures.
Overworked Components
Running multiple programs at once—especially resource-intensive tasks like video editing or gaming—can push your CPU or GPU beyond their typical limits. The harder they work, the more heat they produce. Without adequate cooling, they’ll quickly overheat.
Faulty or Aging Cooling Systems
Fans wear out. Thermal paste dries up. Heatsinks get loose. As components age, they lose effectiveness at transferring or dispersing heat. A system that once ran cool may suddenly begin to overheat because its cooling methods no longer function properly.
Warm Ambient Temperatures
Even the best internal cooling won’t help much if the room temperature is too high. Systems rely on drawing in cooler outside air—so a warm room, especially during summer months, makes it harder for the machine to regulate its internal temperature.
Cramped Internal Layout
Inside your desktop, a mess of tangled cables or tightly packed components can create hot zones with no air movement. In laptops, limited space makes efficient airflow even more crucial. A poorly optimized internal design can make it difficult for heat to escape.
Comparison Table: Heat Contributors at a Glance
| 🔍 Cause | 🔥 Risk It Presents | 💡 Common Scenario |
|---|---|---|
| Blocked Vents | Rapid temperature spikes, throttling | Laptop on blanket or pillow |
| Dust Buildup | Clogged fans, reduced heat transfer | Never cleaned desktop vents |
| Overworked Hardware | Excess heat from prolonged stress | Running games, video editing, or multitasking |
| Failing Cooling Components | Poor airflow or heat conduction | Older system with no recent maintenance |
| Hot Room Environment | Ineffective heat exchange | Using PC near sunny window in summer |
| Cramped Internal Layout | Creates hot spots, uneven cooling | Tightly packed cables or drives in desktop |
🔁 Putting It All Together
Overheating rarely has one single cause. More often, it’s a combination of dust, blocked vents, and hard-working components operating in less-than-ideal conditions. Fortunately, most causes are fixable with a few mindful changes to your setup and maintenance habits.
By recognizing these warning signs and understanding what leads to overheating, you’ll be prepared to make smarter choices and protect your computer from heat-related damage—before it slows you down.
Active and Passive Cooling Solutions Explained
Now that you understand what causes a computer to overheat, let’s talk about how cooling systems work. All computers rely on one or both types of cooling: active and passive. Each plays a role in maintaining safe operating temperatures.
What Is Passive Cooling?
Passive cooling works without moving parts or electrical power. It uses design features and materials to dissipate heat naturally.
- Heat sinks: These metal components draw heat away from your CPU or GPU and spread it out so it can dissipate more easily.
- Ventilation: Strategically placed air vents allow warm air to escape while cooler air moves in.
- Case design: Systems with open layouts and fewer obstructions promote better natural airflow.
📌 Passive cooling is silent and energy-efficient but limited in how much heat it can handle.
What Is Active Cooling?
Active cooling uses powered components to forcefully move heat away from your system.
- Fans: Pull cool air in and push warm air out.
- Internal coolers: Devices attached to the CPU or GPU that often combine heat sinks with fans.
- External support: Some setups include external aids to support airflow under or around a device.
📌 Active cooling is more powerful but requires regular maintenance and proper installation.
Comparison Table: Active vs. Passive Cooling
| ⚙️ Cooling Type | 💨 How It Works | 🔧 Best Use Case |
| Passive | Uses materials, airflow, and heat dissipation | Quiet office workstations, low-power laptops |
| Active | Powered fans or systems force heat out | Gaming PCs, workstations, high-load machines |
📌 Why It Matters
A cooling system is only as good as its design and upkeep. Systems with both passive and active cooling tend to perform better under load and stay quiet when idle. When these two methods work together efficiently, overheating becomes far less likely.
By understanding both approaches, you can better evaluate your system’s current setup and decide whether you need to improve airflow, clean components, or rearrange hardware for maximum efficiency.
Proper Ventilation and Airflow Optimization
Even the most powerful cooling system won’t help if airflow is blocked or poorly managed. Air needs a clear path to enter, circulate, and exit your device. Ventilation setup can make or break your system’s thermal performance—especially over time.
External Setup: Where You Place Your PC Matters
Your environment is the first line of defense against overheating.
- Avoid soft surfaces: Beds, blankets, and cushions can block vents and trap heat.
- Elevate your device: Keeping laptops raised allows air to circulate underneath.
- Leave breathing room: Desktops should have several inches of clearance around all sides—especially the rear exhaust.
- Keep away from heat sources: Don’t place your computer near sunny windows, radiators, or heating vents.
Internal Layout: Clean Paths for Air to Flow
Inside your system, airflow should move in a straight path—from intake to exhaust. Anything disrupting this flow can lead to hot spots.
- Tidy cable management: Loose wires can block fans and airflow corridors. Use clips or ties to keep cables grouped together.
- Fan direction matters: Intake fans should pull air in from the front or bottom, while exhaust fans push it out from the back or top.
- Component spacing: Crammed components trap heat. If possible, leave space between your drives, memory sticks, and GPU.
Ventilation Table: Do’s and Don’ts
| 🧭 Practice | ✅ Best Practice Example | ⚠️ Common Mistake to Avoid |
| Desk Placement | Open desk with 4–6 inches of clearance | Pushed against wall or inside cabinet |
| Surface Use | Hard, flat surfaces like tables | Using laptop on bed or pillow |
| Air Intake/Exhaust Flow | Unblocked front/bottom intake, rear exhaust | Vents placed against walls or objects |
| Cable Management | Routed behind motherboard tray or case sides | Tangled cables near fans or components |
💡 Take This With You
Ventilation is one of the most overlooked aspects of PC performance. But it’s also one of the easiest to improve. Even small changes—like shifting your desktop to a more open space or rerouting one cable—can lower system temperatures significantly.
Consistent airflow doesn’t require expensive upgrades. It just needs smart placement, routine cleaning, and thoughtful organization. That means better performance, quieter operation, and a longer lifespan for your hardware.
Maintenance Practices to Prevent Overheating
Overheating problems often begin with neglected maintenance. A consistent care routine ensures your system stays clean, efficient, and thermally stable. Preventative habits save you from unexpected shutdowns or expensive repairs.
Regular Cleaning Schedule
Dust buildup is the number one cause of thermal inefficiency. It accumulates on fans, filters, heat sinks, and inside vents, restricting airflow and insulating heat.
- Clean vents and fans: Use soft brushes or compressed air to remove dust every 2–3 months.
- Vacuum surroundings: Dust near your workspace gets pulled into the system. Keep the area clean.
- Inspect internals periodically: Carefully check inside your desktop or under your laptop for buildup.
Thermal Component Health
Beyond surface cleaning, internal thermal materials need occasional attention too.
- Reapply thermal paste: This material helps transfer heat between CPUs and their heat sinks. Over time, it dries out.
- Tighten heat sinks: Vibration and time can loosen components, reducing heat transfer efficiency.
- Monitor fan activity: If a fan is too quiet or making noise, it might not be functioning properly.
Environment & Usage Adjustments
Maintenance isn’t only about cleaning—it’s also about how and where you use your system.
- Avoid extreme temperatures: Don’t leave your device in hot cars or next to heating vents.
- Allow cool-down periods: Avoid running high-performance tasks for hours without breaks.
- Use energy settings wisely: Balanced or power saver modes can help limit heat generation when not needed.
Routine Maintenance Table
| 🛠️ Task | ⏱️ Frequency | ✅ Outcome |
| Dust cleaning (vents/fans) | Every 2–3 months | Restores airflow and cooling efficiency |
| Thermal paste replacement | Every 1–2 years | Improves CPU heat transfer |
| Fan functionality check | Quarterly | Prevents failures and overheating |
| Cable organization review | Every 6 months | Enhances airflow and component spacing |
| Workspace surface cleaning | Weekly | Prevents debris from entering system |
🧠 Remember This
Maintenance isn’t a one-time job. Just like you wouldn’t drive a car without oil changes, you shouldn’t expect your computer to perform reliably without care.
A regular routine doesn’t just stop overheating—it extends your device’s usable life and helps maintain optimal performance.
Start small: clean the vents today. Set a reminder to check fans next month. Build the habit, and your system will thank you with speed and stability. of PC performance. But it’s also one of the easiest to improve. Even small changes—like shifting your desktop to a more open space or rerouting one cable—can lower system temperatures significantly.
Consistent airflow doesn’t require expensive upgrades. It just needs smart placement, routine cleaning, and thoughtful organization. That means better performance, quieter operation, and a longer lifespan for your hardware.
Monitoring System Temperatures & Performance
All diagnostics and maintenance actions described in this guide use built-in system tools or manual cleaning methods—no downloads or third-party software are required.
Monitoring your computer’s temperature and performance is a proactive step toward avoiding overheating before it causes serious problems. By staying aware of how your system behaves under different workloads, you can catch thermal issues early and take corrective action.
Understanding Key Temperature Zones
Different components have different safe temperature ranges. Here’s a basic breakdown:
| 💻 Component | 🌡️ Typical Operating Range | ⚠️ Risk Zone (Too Hot) |
| CPU | 30°C – 70°C | 80°C+ |
| GPU | 40°C – 85°C | 90°C+ |
| Motherboard Chip | 30°C – 60°C | 70°C+ |
| Hard Drive (HDD) | 30°C – 50°C | 55°C+ |
| Solid State Drive | 30°C – 60°C | 70°C+ |
These values vary depending on your device’s age, configuration, and ventilation. Consistently operating in the risk zone shortens hardware lifespan and increases crash likelihood.
Signs Your System Might Be Running Too Hot
- Fans are constantly running at full speed
- Sudden drops in frame rate or responsiveness during usage
- Device feels unusually warm to the touch—even when idle
- Applications crash unexpectedly
- System restarts without warning
Steps to Monitor Temperatures
You don’t need advanced skills to track system heat—just consistent habits:
- Check during idle and high-load usage: Record temperatures when your PC is sitting idle and again after heavy use.
- Compare performance trends over time: Watch for rising average temperatures. It could be a sign of dust buildup or component wear.
- Log and review: Take note of thermal spikes during specific tasks. These clues help diagnose airflow or software issues.
Best Practices for Ongoing Thermal Awareness
- Observe fan behavior: Fans ramping up quickly can indicate high temps.
- Watch your workspace environment: High room temperatures directly affect internal heat.
- Don’t ignore lag or noise: Performance dips and loud fans are early warnings of potential overheating.
💡 Take This With You
Regular temperature checks aren’t just for enthusiasts—they’re for anyone who wants to extend their computer’s life. Monitoring thermal behavior doesn’t require fancy tools or deep technical knowledge. With routine attention, you can avoid serious slowdowns and catch small problems before they become major ones.
Treat your system like a thermometer: when it starts feeling hot or acting strange, check in. Staying proactive will help your machine stay cool, quiet, and efficient.. Just like you wouldn’t drive a car without oil changes, you shouldn’t expect your computer to perform reliably without care.
A regular routine doesn’t just stop overheating—it extends your device’s usable life and helps maintain optimal performance.
Start small: clean the vents today. Set a reminder to check fans next month. Build the habit, and your system will thank you with speed and stability. of PC performance. But it’s also one of the easiest to improve. Even small changes—like shifting your desktop to a more open space or rerouting one cable—can lower system temperatures significantly.
Consistent airflow doesn’t require expensive upgrades. It just needs smart placement, routine cleaning, and thoughtful organization. That means better performance, quieter operation, and a longer lifespan for your hardware.
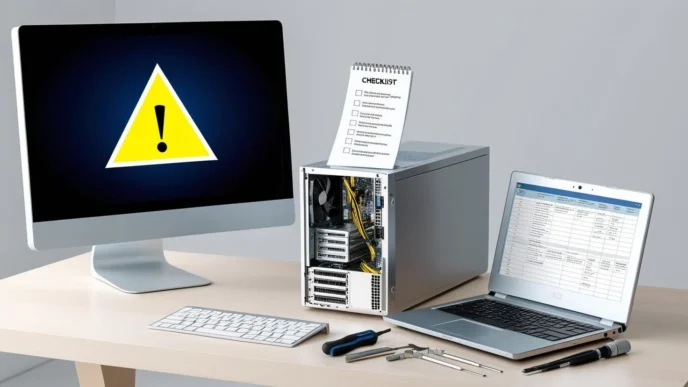
Troubleshooting Checklist for Overheating PCs
If your computer is overheating and you’re not sure where to begin, this step-by-step checklist can help you diagnose the issue systematically. These actions are designed for users of all levels and can be performed without specialized knowledge.
🔍 Step 1: Visually Inspect Your System
- Look for dust buildup around vents, fans, and internal components.
- Check for blocked airflow (e.g., wall against a rear exhaust fan).
- Make sure your computer isn’t placed on a soft or uneven surface.
🔧 Step 2: Listen for Unusual Noises
- Is your fan running louder than usual?
- Does it sound like it’s straining or clicking?
- Are there periods of silence where the fan should be active?
These clues often indicate failing or obstructed cooling hardware.
💨 Step 3: Feel the Exterior Heat
- Touch the underside of your laptop or side panels of your desktop.
- Extreme warmth—especially near vents—is a clear overheating symptom.
- Consistently hot areas might point to failing heat dispersion in that zone.
⚙️ Step 4: Restart and Monitor Behavior
- Reboot your device and observe how quickly fans activate.
- Open a few light programs—check for lag, heat increase, or loud fans.
- If performance drops quickly, you may be facing airflow or cooling inefficiency.
🛠️ Step 5: Clean and Reorganize
- Use safe cleaning tools to remove visible dust from vents and fans.
- Untangle and re-route any cables blocking airflow.
- Reposition the system to improve ventilation.
🧪 Step 6: Monitor Temperatures Again
- After adjustments, reassess thermal performance under normal workloads.
- Ensure temperatures have dropped to safer levels.
- If no improvement, the issue may involve deeper hardware concerns.
✅ Step 7: Escalate Only If Needed
- If the system still runs hot after all steps, consider checking internal components like thermal paste or fan alignment.
- Consult a technician if you’re uncomfortable opening the system.
📌 Why It Matters
Overheating can cause permanent damage if left unchecked. A checklist approach breaks the problem down into manageable steps, helping you stay calm and methodical instead of overwhelmed. Small tweaks—like cleaning vents or shifting your PC—can restore performance quickly and effectively.
The more familiar you become with your system’s baseline behavior, the quicker you’ll catch and correct thermal issues. This proactive strategy keeps your device safer, cooler, and running at its best.
If you’re unsure about any of these steps or uncomfortable performing them, it’s always best to consult a qualified technician.
Real-World Case Scenarios
Understanding overheating isn’t just about theory—real people experience these issues every day. Below are relatable, real-world situations that illustrate how overheating manifests and how simple fixes can lead to lasting solutions.
🎓 Scenario 1: The Student with a Warm Laptop
Background: A college student uses a laptop on their bed during long study sessions. Over time, the device starts slowing down, and the fan runs constantly.
Problem: The soft bedding blocks air intake vents underneath the laptop, trapping heat and restricting airflow.
Fix: Moving the laptop to a flat desk and propping it up slightly improves airflow. Regular surface cleaning reduces dust intake, and the system stabilizes in temperature.
💼 Scenario 2: Remote Worker with a Cluttered Setup
Background: A remote employee keeps their desktop tower tucked inside a cabinet for aesthetic reasons. Video calls and multitasking apps begin lagging.
Problem: The enclosed space doesn’t allow hot air to escape, creating a heat trap.
Fix: Relocating the PC to an open desk area with at least 6 inches of clearance around all sides allows airflow to circulate, dropping internal temperatures significantly.
🧑💻 Scenario 3: Creative Professional Facing Crashes
Background: A graphic designer works on high-resolution projects and notices the system crashes after 2–3 hours of use.
Problem: High workloads push the CPU and GPU to generate heat faster than the outdated thermal solution can handle.
Fix: Replacing dried thermal paste and adjusting energy settings for balanced performance help extend session duration and reduce heat spikes.
🧱 Scenario 4: Desktop Gamer with Poor Cable Management
Background: A gamer notices high frame rate drops during intense sessions. On inspection, cables are sprawled across internal components.
Problem: Messy cables block airflow inside the tower, leading to localized overheating.
Fix: Tidying cables using clips and routing them behind the motherboard tray improves airflow and stabilizes system performance.
🔁 Putting It All Together
These examples show that overheating doesn’t only happen under extreme conditions. Everyday habits, placement choices, and minor oversights can push temperatures into unsafe territory. The good news? Most fixes are quick, inexpensive, and completely doable—even for beginners.
Learn from these cases to apply the same solutions at home. The next time your system feels hot or slows down, remember: environment, layout, and maintenance matter more than you think. if left unchecked. A checklist approach breaks the problem down into manageable steps, helping you stay calm and methodical instead of overwhelmed. Small tweaks—like cleaning vents or shifting your PC—can restore performance quickly and effectively.
Consequences of Ignoring Overheating
When a computer overheats once or twice, it may seem like a minor issue. But ignoring thermal problems over time can lead to serious consequences—many of which are costly or irreversible.
🔥 Component Damage
Heat is a silent killer for electronics. Prolonged exposure to high temperatures breaks down sensitive circuits and can permanently damage components like:
- CPUs and GPUs: Excessive heat reduces processing power and may cause chip degradation.
- Motherboards: Prolonged stress can warp or damage delicate traces and sockets.
- Drives: Hard drives, especially mechanical ones, are highly sensitive to heat and prone to failure under stress.
🧯 System Shutdowns & Data Loss
Modern systems often shut down automatically to prevent damage—but sudden shutdowns can corrupt active files and interrupt important processes. Over time, this creates:
- Frequent loss of unsaved work
- Corrupted operating systems or apps
- Increased frustration and workflow disruption
💰 Costly Repairs and Replacement
Continued overheating can force you into early repairs—or worse, full system replacements. What starts as a simple cleaning issue might snowball into replacing fans, motherboards, or processors.
| ⚠️ Risk | 💸 Long-Term Cost |
| Ignored dust buildup | Heat damage → component failure |
| Faulty fans | Inconsistent cooling → crash cycles |
| Thermal paste wear | Overheating → CPU degradation |
🐢 Reduced Performance
Heat directly impacts speed. When your system gets too hot, it starts throttling—automatically reducing performance to cool down. This results in:
- Slower processing speeds
- Lag in games or creative software
- Delay in multitasking and responsiveness
📉 Shortened Lifespan
Just like humans under stress, computers wear out faster when running hot. Regular overheating shortens the life expectancy of nearly every internal part. Even if the device stays operational, it becomes increasingly unstable and unpredictable.
💡 Take This With You
Heat doesn’t just make your PC uncomfortable to use—it slowly undermines everything that makes it useful. From processing power to longevity, the cost of neglecting overheating grows every day it’s left unaddressed.
Preventative action is easier, cheaper, and more effective than recovery. Don’t wait for crashes or smoke. Start with one improvement today, and you’ll build a system that runs cooler, lasts longer, and serves you better in the long run. under extreme conditions. Everyday habits, placement choices, and minor oversights can push temperatures into unsafe territory. The good news? Most fixes are quick, inexpensive, and completely doable—even for beginners.
Long-Term Strategies for a Cooler System
While short-term fixes are helpful, adopting sustainable habits and smarter system configurations ensures that your computer stays cool over time. Here’s how to build a heat-resilient setup and maintain it for the long haul.
🌍 Optimize Your Environment Year-Round
Your workspace affects your system’s internal temperatures more than you may think.
- Keep it cool and shaded: Avoid placing your computer near windows, heaters, or in direct sunlight.
- Allow open airflow: Position your computer where air can circulate freely around all sides.
- Seasonal checkups: As temperatures rise in summer, increase your maintenance efforts.
🧠 Adjust Performance Habits
Software behavior can have a lasting impact on hardware temperatures.
- Limit background processes: Close unused programs to reduce CPU and memory load.
- Use power management settings: Switch to balanced or power-saving modes during light tasks.
- Avoid constant high-intensity use: Spread out demanding workloads and allow rest periods.
🧰 Improve Physical Setup
Invest time into configuring your system with airflow in mind.
- Use elevation for laptops: A slight lift encourages natural airflow underneath.
- Space out internal components: If you’re comfortable with PC building, rearrange items inside for better air circulation.
- Organize cables: Tidy cabling clears pathways for air and reduces hot spots.
📊 Comparison Table: Smart vs. Risky Long-Term Habits
| 🧩 Strategy Area | ✅ Long-Term Friendly Practice | ⚠️ Habit That Risks Overheating |
|---|---|---|
| Workspace Setup | Elevated, open space with shade | Placed in cabinets or near heat sources |
| Software Use | Light multitasking with breaks | Continuous high-load applications |
| Internal Layout | Clear airflow paths, spaced components | Cramped internals with blocked vents |
| Maintenance Frequency | Cleaned quarterly, reviewed annually | Only cleaned when issues arise |
🧠 Remember This
Long-term success against overheating isn’t about perfection—it’s about prevention. Sustainable changes to your environment, computing habits, and setup configuration will keep your device running smoothly and quietly.
Think of it as climate control for your computer. With a few proactive choices today, you’ll reduce your risk of system crashes, data loss, and early hardware failure tomorrow. Make heat management a routine, not a reaction.
✅ Summary Checklist & Maintenance Plan
To make heat management effortless, here’s a final, easy-to-follow checklist you can reference regularly. Keeping these maintenance steps in mind will help your system stay healthy and high-performing year-round.
🗂️ Quick Reference: Overheating Prevention Checklist
- 🔄 Clean your vents and fans every 2–3 months
- 🧼 Dust your workspace weekly to prevent intake blockages
- 📏 Keep 4–6 inches of clearance around all sides of your PC
- 🔌 Monitor fan activity and system noise for unusual changes
- 🧊 Check system temperatures during both idle and active use
- 🧰 Reapply thermal paste every 1–2 years if overheating persists
- 📅 Schedule seasonal maintenance, especially before summer
- 🧹 Keep cables tidy and clear of airflow paths
- ⚙️ Review energy and performance settings quarterly
📅 Suggested Maintenance Plan
| 🛠️ Task | ⏱️ Frequency | 🔍 Notes |
| Clean vents and fans | Every 2–3 months | Use non-abrasive tools and safe cleaning steps |
| Inspect thermal paste/fans | Every 12–18 months | Especially for older systems or heavy usage |
| Monitor temperatures | Monthly | Take note of load conditions |
| Cable management check | Every 6 months | Clear any blockages or tangles |
| Environment and airflow review | Each season change | Adjust desk setup or clearance as needed |
🔁 Putting It All Together
Overheating doesn’t have to be an ongoing threat. With this checklist and a bit of awareness, you’ll be equipped to prevent heat issues before they start.
Whether you’re on a laptop or desktop, at work or home, these simple steps will protect your hardware, preserve your data, and save you time and money in the long run. Start using the plan today, and make it part of your computing routine.—it’s about prevention. Sustainable changes to your environment, computing habits, and setup configuration will keep your device running smoothly and quietly.
🔚 Conclusion: Take Control of Your PC’s Thermal Health
Staying ahead of overheating doesn’t require advanced technical knowledge—it simply takes awareness, consistency, and action. You’ve now seen the causes, learned how to fix the most common overheating problems, and understand what it takes to prevent them from coming back.
Cooling your computer isn’t just about better performance—it’s about protecting your investment. The small effort you put into maintenance today saves you from crashes, repairs, and frustration tomorrow.
By building a routine that includes cleaning, airflow checks, and thermal awareness, you’re taking ownership of your PC’s long-term performance.
So here’s your next step: pick one thing from this guide and do it today. Whether it’s clearing space around your setup or checking your fan activity, your system will thank you.
Stay cool, stay in control—and enjoy a safer, faster, and longer-lasting computer experience.
📌 Privacy Note: This article is for general informational purposes only. It does not collect personal data, and no professional services are being sold through this guide.
