Introduction: Affordable Upgrades That Make a Big Impact
If your Windows computer has been dragging, freezing, or taking what feels like forever to start up, you’re not alone. Many users assume the only solution is buying a new device—but in most cases, you can dramatically improve performance with just a few targeted, budget-friendly upgrades. This section sets the stage for everything you need to know to get started safely, efficiently, and affordably.
Computers slow down over time for many reasons—aging hardware, increased software demands, or just years of accumulated clutter. However, that doesn’t mean they’re beyond saving. Often, upgrading a single component like memory or switching to a faster type of storage can breathe new life into your system. These changes don’t require expert skills or expensive parts. In fact, with the right approach, you can achieve smoother performance, faster boot times, and improved stability without draining your wallet.
This guide is designed specifically for Windows PC and laptop users who want to stretch the value of their current setup. Whether you’re a student trying to keep up with coursework, a remote worker juggling video calls and productivity apps, or a small business owner managing essential software on a tight budget—there’s something here for you.
We’ll walk you through:
- 🛠️ How to recognize when your PC truly needs a hardware upgrade
- 🧠 What to look for when selecting compatible and cost-effective components
- 💡 Step-by-step guidance for installing upgrades like RAM, SSDs, or GPUs
- 📌 Bonus tips for saving money and extending your computer’s usable life
All strategies outlined are beginner-friendly and focus on maximizing results with minimal expense or risk. No advanced tools, no unnecessary spending—just straightforward advice built around real-world examples.
By the end of this guide, you’ll be equipped to evaluate your system’s needs, make smart purchasing decisions, and perform upgrades with confidence. Even small changes can have a major impact, turning a sluggish machine into one that’s ready to meet your daily demands.
📌 Why It Matters: You don’t need a brand-new PC to enjoy faster performance. Sometimes, the right upgrades at the right time can do more than an entirely new device—especially when you’re working on a budget.
Start with a System Check: When Is It Time to Upgrade?
Before you spend a dime on hardware, the first step is understanding whether your computer truly needs an upgrade—or if some basic clean-up and optimization would do the trick. It’s easy to assume that slow performance means outdated components, but often the problem lies elsewhere. Performing a system check gives you a clear picture of where the bottlenecks are and helps you make smarter decisions about what, if anything, to upgrade.
Know the Signs of Hardware Limits
Some signs of performance problems are linked more to hardware limitations than temporary clutter:
- 🧠 Programs freeze or crash when you open multiple browser tabs
- ⚙️ Your computer takes several minutes to start up
- 📁 File transfers crawl or stall entirely
- 🔄 Apps load slowly or stutter during use
These symptoms suggest you might be pushing your system beyond its hardware capacity—especially if they persist after cleaning up junk files or restarting the machine.
Use Built-In Windows Tools for Diagnosis
To get a clearer view of what’s slowing things down, open the Task Manager. This tool shows live data on your CPU, memory (RAM), disk, and network usage.
- If memory is consistently maxed out near 90–100%, your system may need more RAM.
- If the disk usage stays high even when no apps are open, your hard drive may be under strain.
- High CPU usage during light tasks can indicate that your processor is being pushed too hard.
Also, check your Storage settings to see how much space is left. A nearly full drive—especially a traditional hard disk—can drag down overall responsiveness.
Real-World Scenario: Memory Maxed Out
A student uses their laptop for research, video calls, and word processing. Even after deleting unused files and disabling unnecessary startup apps, the machine still freezes during multitasking. A quick check in Task Manager shows the RAM usage constantly hovering near 95%—a clear signal that an upgrade is needed.
📌 Why It Matters: Jumping straight to upgrades without checking system performance can waste time and money. Diagnosing the right problem ensures you only upgrade what’s necessary—and nothing more.
Upgrade #1 – Adding More RAM for Smoother Multitasking
One of the simplest and most budget-friendly ways to boost your PC’s performance is by upgrading the RAM (Random Access Memory). RAM is where your computer stores data it’s currently using, and when you don’t have enough, the system relies on slower storage—causing lag and reduced responsiveness. If you multitask frequently, stream videos while working, or notice programs freezing up, more RAM might be your best first upgrade.
What RAM Does and Why It Matters
RAM handles your active processes—everything from open tabs in your browser to background system tasks. If your memory fills up, your computer starts using virtual memory, which is significantly slower. This can lead to delays when switching between apps or loading large files.
Upgrading RAM gives your system more breathing room, making multitasking smoother and reducing the chances of crashing or freezing.
How to Choose the Right RAM
Before purchasing new RAM, you’ll need to understand what type is compatible with your system:
- Check your system’s current RAM type (e.g., DDR3, DDR4)
- Determine the maximum supported capacity and number of available slots
- Choose the right form factor—laptops use smaller sticks than desktops
This information is usually accessible through system information tools or your motherboard/laptop documentation.
Beginner-Friendly Installation Process
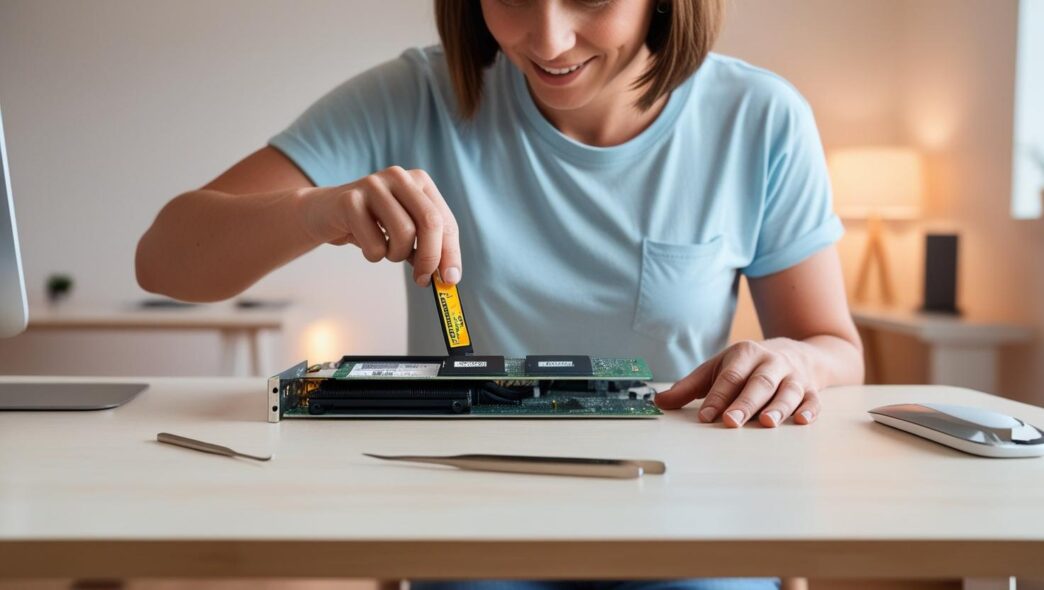
Installing RAM is a straightforward process once you have the right module:
- Shut down your PC completely and unplug all cables
- Open the case (or access panel for laptops)
- Ground yourself to avoid static discharge
- Locate the existing RAM slots
- If necessary, remove old sticks to make room
- Insert the new module at an angle and press until it clicks
- Close everything up and power on your system
Most systems will automatically recognize the new memory. You can verify installation through Task Manager or system information.
Mini-Scenario: A Remote Worker’s Transformation
A remote worker had frequent issues with video calls freezing when running spreadsheet software and browser tabs simultaneously. After upgrading from 4GB to 8GB of RAM, the system became significantly more stable. Multitasking was no longer a problem, and productivity improved immediately.
Optional Table: RAM Size vs. Typical Use Case
| RAM Size | Suitable For |
|---|---|
| 4GB | Basic use: email, single tab browsing |
| 8GB | Standard multitasking, office software |
| 16GB | Heavy multitasking, video editing, gaming |
💡 Take This With You: RAM is a high-value, low-cost upgrade that delivers noticeable improvements in stability and speed—especially for everyday multitaskers.
Upgrade #2 – Swap Your HDD for an SSD
If your PC still relies on an older hard disk drive (HDD), one of the most dramatic speed improvements you can make is upgrading to a solid-state drive (SSD). Unlike HDDs, which rely on spinning disks to read and write data, SSDs use flash memory to access data almost instantly. This difference can transform your overall system experience—especially when it comes to boot time, file access, and application launches.
Why SSDs Are Faster
SSDs don’t have moving parts, which eliminates the delay caused by mechanical arm movement inside traditional hard drives. This means:
- ⚡ Faster startup times (often under 30 seconds)
- 📂 Quick access to files and folders
- 🚀 Rapid loading of applications, even large programs
For everyday users, the difference can feel like night and day—especially if your current system takes minutes to boot or struggles to launch programs efficiently.
Choosing the Right SSD
Before you buy, it’s important to know which kind of SSD your system supports. Here are two key considerations:
- Form Factor: Laptops typically support smaller drives, while desktops offer more flexibility.
- Interface Type: SATA drives are more common and affordable, while others offer even faster speeds—but may require specific hardware support.
Check your PC’s specifications to identify available drive slots and supported interfaces. This helps avoid compatibility issues.
Installation Basics for Beginners
Replacing an HDD with an SSD might sound intimidating, but it’s achievable with patience and the right preparation. Here’s an overview of what to expect:
- Backup your data: Copy important files to an external drive.
- Power down and unplug your device.
- Access the internal drive bay: Unscrew the back panel (for laptops) or side panel (for desktops).
- Remove the old drive and insert the new SSD securely.
- Reconnect and close the system.
- Reinstall your operating system or use cloning software to duplicate your original drive.
While cloning can preserve your setup, many users opt for a fresh installation for optimal performance.
Real-World Example
A freelancer working from home was frustrated by long boot times and delayed application launches. By replacing their old HDD with a modestly sized SSD, their system went from taking nearly two minutes to boot to just under 30 seconds—resulting in a noticeably faster and more productive workflow.
Optional Comparison Table: HDD vs. SSD Performance
| Feature | HDD 🌀 | SSD ⚡ |
|---|---|---|
| Boot Time | 1.5–3 minutes | 15–30 seconds |
| App Launch Speed | Moderate | Fast |
| Durability (no moving parts) | No | Yes |
| Noise Level | Audible clicking | Silent |
| Power Consumption | Higher | Lower |
🔁 Putting It All Together: Upgrading to an SSD is one of the most cost-effective and performance-boosting changes you can make to a Windows PC. Whether you’re working, gaming, or simply browsing the web, this upgrade makes your system feel newer, faster, and more responsive—without breaking the bank.
Upgrade #3 – A GPU Upgrade for Gaming or Creative Work
For many users, especially those who enjoy gaming or work with graphics-intensive applications, upgrading the graphics processing unit (GPU) can be a major turning point in their PC’s capabilities. A well-chosen GPU doesn’t just boost visual performance; it can unlock entirely new functionality for creative software, 3D rendering, or multi-monitor setups.
When a GPU Upgrade Makes Sense
Not every user needs a powerful graphics card. But if you experience choppy frame rates while gaming, sluggish video editing performance, or limited resolution support, a GPU upgrade could be the solution. Here are a few signs it may be time:
- ✨ Stuttering or lag in 3D games or HD video playback
- ✨ Inability to run newer software requiring GPU acceleration
- ✨ Limited support for external displays or 4K resolution
A dedicated GPU is particularly beneficial for those working with image editing, video production, or design programs that offload tasks from the CPU to the graphics card.
Understanding Integrated vs. Dedicated Graphics
Most entry-level PCs and laptops rely on integrated graphics, which are built into the CPU. These work fine for basic tasks, but they struggle with demanding visuals. A dedicated GPU, on the other hand, has its own processor and memory, dramatically increasing graphics performance.
Before investing, determine whether your system supports a dedicated graphics card. Desktops usually offer more flexibility, while many laptops cannot be upgraded.
Key Compatibility Considerations
Before purchasing, it’s important to check:
- ✨ Power Supply: Ensure your system can deliver enough power to support the new GPU.
- ✨ Space: Some cards are physically large and may not fit in smaller PC cases.
- ✨ Cooling: Upgrading the GPU may require improved airflow to prevent overheating.
Planning ahead for these factors prevents frustration and helps ensure a successful installation.
Basic Installation Steps
Installing a GPU in a desktop typically involves:
- Shutting down the PC and unplugging all power sources.
- Opening the case and identifying the PCIe slot.
- Inserting the card carefully and securing it in place.
- Connecting any necessary power cables.
- Restarting the system and adjusting display settings as needed.
Laptop users should know that most models do not support GPU upgrades due to physical constraints. In such cases, software optimization or external graphics solutions (where compatible) might be the only option.
Real-World Example
A casual gamer upgrades from integrated graphics to a low-cost dedicated GPU. As a result, games that previously ran on low settings now achieve smooth frame rates on medium settings, dramatically improving the user experience.
📌 Why It Matters: A strategic GPU upgrade doesn’t have to be expensive. When chosen correctly, it can open the door to better graphics, more demanding software capabilities, and an overall more responsive computing experience.
Compatibility 101: How to Choose the Right Parts for Your PC
All upgrade instructions in this guide use basic manual methods or built-in Windows system tools—no third-party software or advanced technical modifications are required.
Before you invest in any upgrades, it’s essential to ensure that the new components will work with your current system. Compatibility isn’t just about making sure things fit physically—it’s also about matching the right specifications so your system can recognize and use the new hardware effectively. Skipping this step can lead to frustration, wasted money, or even system damage.
Understand Your System’s Limitations
Every Windows PC or laptop has specific limitations based on its motherboard, power supply, and case size. These include:
- 🧠 RAM Compatibility: Your motherboard supports only certain types (e.g., DDR3, DDR4) and a maximum amount of RAM.
- ⚙️ Drive Support: Storage upgrades (like SSDs) depend on available ports (e.g., SATA, M.2) and physical space in your case or chassis.
- 🔌 Graphics Card Fit: A GPU upgrade requires not only a free PCIe slot but also enough physical room in your case and sufficient power supply wattage.
How to Check Compatibility (Without Third-Party Tools)
You can gather key information using only Windows’ built-in tools and a bit of research:
- Use System Information to check your motherboard and installed memory type.
- Open Task Manager > Performance tab to see memory speed, number of slots used, and storage configurations.
- Visually inspect your case’s internal space and power supply wattage label.
If you’re upgrading a laptop, note that your options may be limited to RAM and storage. Many laptops do not allow GPU or CPU upgrades, so it’s important to review the device manual or documentation first.
Watch Out for Common Compatibility Pitfalls
- Installing the wrong type of RAM (e.g., DDR4 into a DDR3 slot) won’t work—and could cause physical damage.
- NVMe SSDs may require a specific M.2 slot, which isn’t always present or enabled in BIOS.
- Older power supplies may lack the connectors needed for modern GPUs.
Creating a simple checklist before buying any part can help you avoid costly returns and ensure a smooth upgrade.
📌 Why It Matters: Choosing the right parts saves time, money, and hassle. A compatible upgrade not only performs better—it also ensures long-term stability and avoids damage to your system. Before you click “buy,” double-check that your system supports the component you’re choosing.
Step-by-Step Installation Basics for Beginners
Upgrading your PC hardware doesn’t have to be intimidating. With a few simple tools and a careful approach, even first-time users can install components like RAM, SSDs, or GPUs with confidence. This section breaks down the process into beginner-friendly steps, so you can safely upgrade your system and enjoy better performance—without needing advanced technical knowledge or professional help.
Whether you’re adding memory, replacing a hard drive, or installing a new graphics card, these steps will guide you through the process while minimizing risks. Knowing what to expect and how to prepare can help prevent common mistakes that lead to frustration or system errors.
General Safety First: Prepare Before You Upgrade
Before touching any components, take these important safety steps:
- 🔌 Unplug the computer and power it down fully.
- 🧤 Use an anti-static method, like touching a grounded metal surface, to prevent electrostatic discharge.
- 📦 Work on a clean, flat surface with enough room to lay out tools and parts.
RAM Installation: Click and Go
- Open your PC case or access panel (for laptops, this may be a backplate).
- Locate the memory slots on the motherboard.
- Align the RAM stick with the notch and gently press until it clicks into place.
- Confirm it’s seated evenly on both ends.
💡 Tip: Don’t force it. If the RAM doesn’t fit, double-check the orientation and slot type.
SSD Installation: Speed Upgrade Made Easy
- Determine where your new drive will go—either in a 2.5-inch bay or an M.2 slot.
- Mount the SSD and connect it to the motherboard using the appropriate cables or slot.
- If replacing an old drive, clone your data or do a fresh install before removing the original.
- Once installed, boot into your system and initialize the drive from the Disk Management tool.
📌 Why It Matters: SSDs provide some of the most noticeable performance gains—and installation is often simpler than expected.
GPU Installation: For Gaming or Creative Workloads
- Power down your system and unplug all cables.
- Remove the case’s side panel and locate the PCIe slot.
- Gently insert the GPU into the slot until it clicks.
- Connect any required power supply cables.
- Secure the GPU bracket to the case using screws.
- Close the case, plug everything back in, and start the PC.
🔁 Putting It All Together: Most upgrades follow a similar rhythm—power down, connect carefully, and double-check each connection. Once installed, verify that your system recognizes the new part and test your performance improvements.
With the right prep and mindset, PC upgrades are both safe and satisfying. Start small, go slow, and let the results speak for themselves.
If you’re unsure about any of these steps or uncomfortable performing them, it’s always best to consult a qualified technician.
Bonus Tips to Save Money and Extend Value
Upgrading your PC doesn’t have to mean draining your wallet. In fact, some of the most effective improvements come from careful planning and cost-conscious decisions. This section offers practical strategies that stretch your upgrade dollars further while making sure your system remains useful and responsive for years to come.
Focus on What Slows You Down Most
Instead of replacing multiple components all at once, target the upgrade that addresses your biggest bottleneck. This could be limited memory, slow storage, or underpowered graphics. Start with a system check to see what consistently maxes out during everyday use.
- 🧠 If memory fills up while running multiple browser tabs, consider a RAM upgrade.
- 🧠 If load times are painfully slow, your storage drive may be the limiting factor.
- 🧠 If games or design software lag or crash, your graphics processor might be the issue.
Addressing the most noticeable problem first usually gives the highest return on your investment.
Consider Repurposing or Reusing Existing Parts
If you’ve upgraded in the past or have access to an older system, check if any usable components can be repurposed. Even items like power cables, secondary drives, or RAM (if compatible) can save you money. Just be sure to verify compatibility with your current hardware setup before reusing parts.
Match Your Upgrade to Your Actual Usage
A common mistake is overbuying for needs you don’t have. A student writing papers and browsing the internet doesn’t need the same upgrades as a video editor or a gamer. Ask yourself:
- How demanding are the tasks I do daily?
- Am I doing more work or play?
- Do I need better speed, visuals, or multitasking?
Prioritizing based on use prevents unnecessary spending and keeps the system balanced.
Shop Smart and Be Patient
Avoid rushing into purchases. Keep an eye out for seasonal sales, local deals, or refurbished components from trustworthy sources. Setting a small budget and sticking to it will help you focus on value rather than flash.
Mini-Scenario: A casual home user looking to reduce boot times upgraded only their memory and swapped their drive, spending less than a full replacement—and avoided years of future slowdowns.
📌 Why It Matters: Strategic spending on upgrades lets you get the most out of your current PC, extending its usefulness without sacrificing performance or budget.
Conclusion: Smart, Affordable Upgrades Anyone Can Do
Upgrading your PC doesn’t have to be expensive, complicated, or intimidating. In fact, with just a few basic improvements—like adding memory, replacing an old hard drive with a faster one, or adjusting system settings—you can breathe new life into an aging computer. This guide has shown that performance issues often come down to specific bottlenecks, not the overall age of the machine. And targeting those weak points with simple upgrades can produce noticeable, lasting improvements.
Throughout this guide, we’ve explored several cost-effective ways to improve a PC’s speed and responsiveness:
- 🧠 Identifying slowdowns using built-in Windows tools before upgrading
- 🧠 Installing additional RAM for smoother multitasking
- 🧠 Swapping out a hard disk for a solid-state drive to speed up boot and load times
- 🧠 Adding a dedicated graphics card for users focused on gaming or creative workloads
- 🧠 Verifying part compatibility to avoid costly mistakes
- 🧠 Following beginner-safe steps to install hardware upgrades
- 🧠 Stretching your dollar with smart buying strategies and basic maintenance habits
Each upgrade works best when it aligns with your actual usage needs. For example, a casual web browser may benefit more from an SSD than a new graphics card, while a multitasker might find doubling their RAM makes the system feel brand new.
You don’t need to overhaul your entire setup or chase the latest components. Most users can achieve real gains with one or two well-planned, budget-friendly improvements. Better still, learning how to do these upgrades yourself not only saves money—it builds long-term confidence in managing and maintaining your device.
💡 Take This With You: Your PC’s performance doesn’t depend on how new or expensive it is. With the right upgrades in the right places—and a little care along the way—you can create a faster, more reliable system that works with you, not against you.
📌 Privacy Note: This article is for general informational purposes only. It does not collect personal data, and no professional services are being sold through this guide.


